We missed a meeting due to weather, and so I talked about some ideas to make up the time with one of the build team members. One idea that came out of that discussion was to involve more people in the build process, regardless of that team they’re on. Another idea was to prepare bags of required parts so there wasn’t a logjam at the parts table.
We turned to the whiteboard and broke the task of building the machine into a number of parts: Two sides, front, back, top, extruder, and X assembly. Each of these was going to be at small team of 2-3 kids so that each child would have an opportunity to contribute to the actual build. We came up with some silly names to identify the team — names like “Team Eyeball” and “Team Hamburger.”
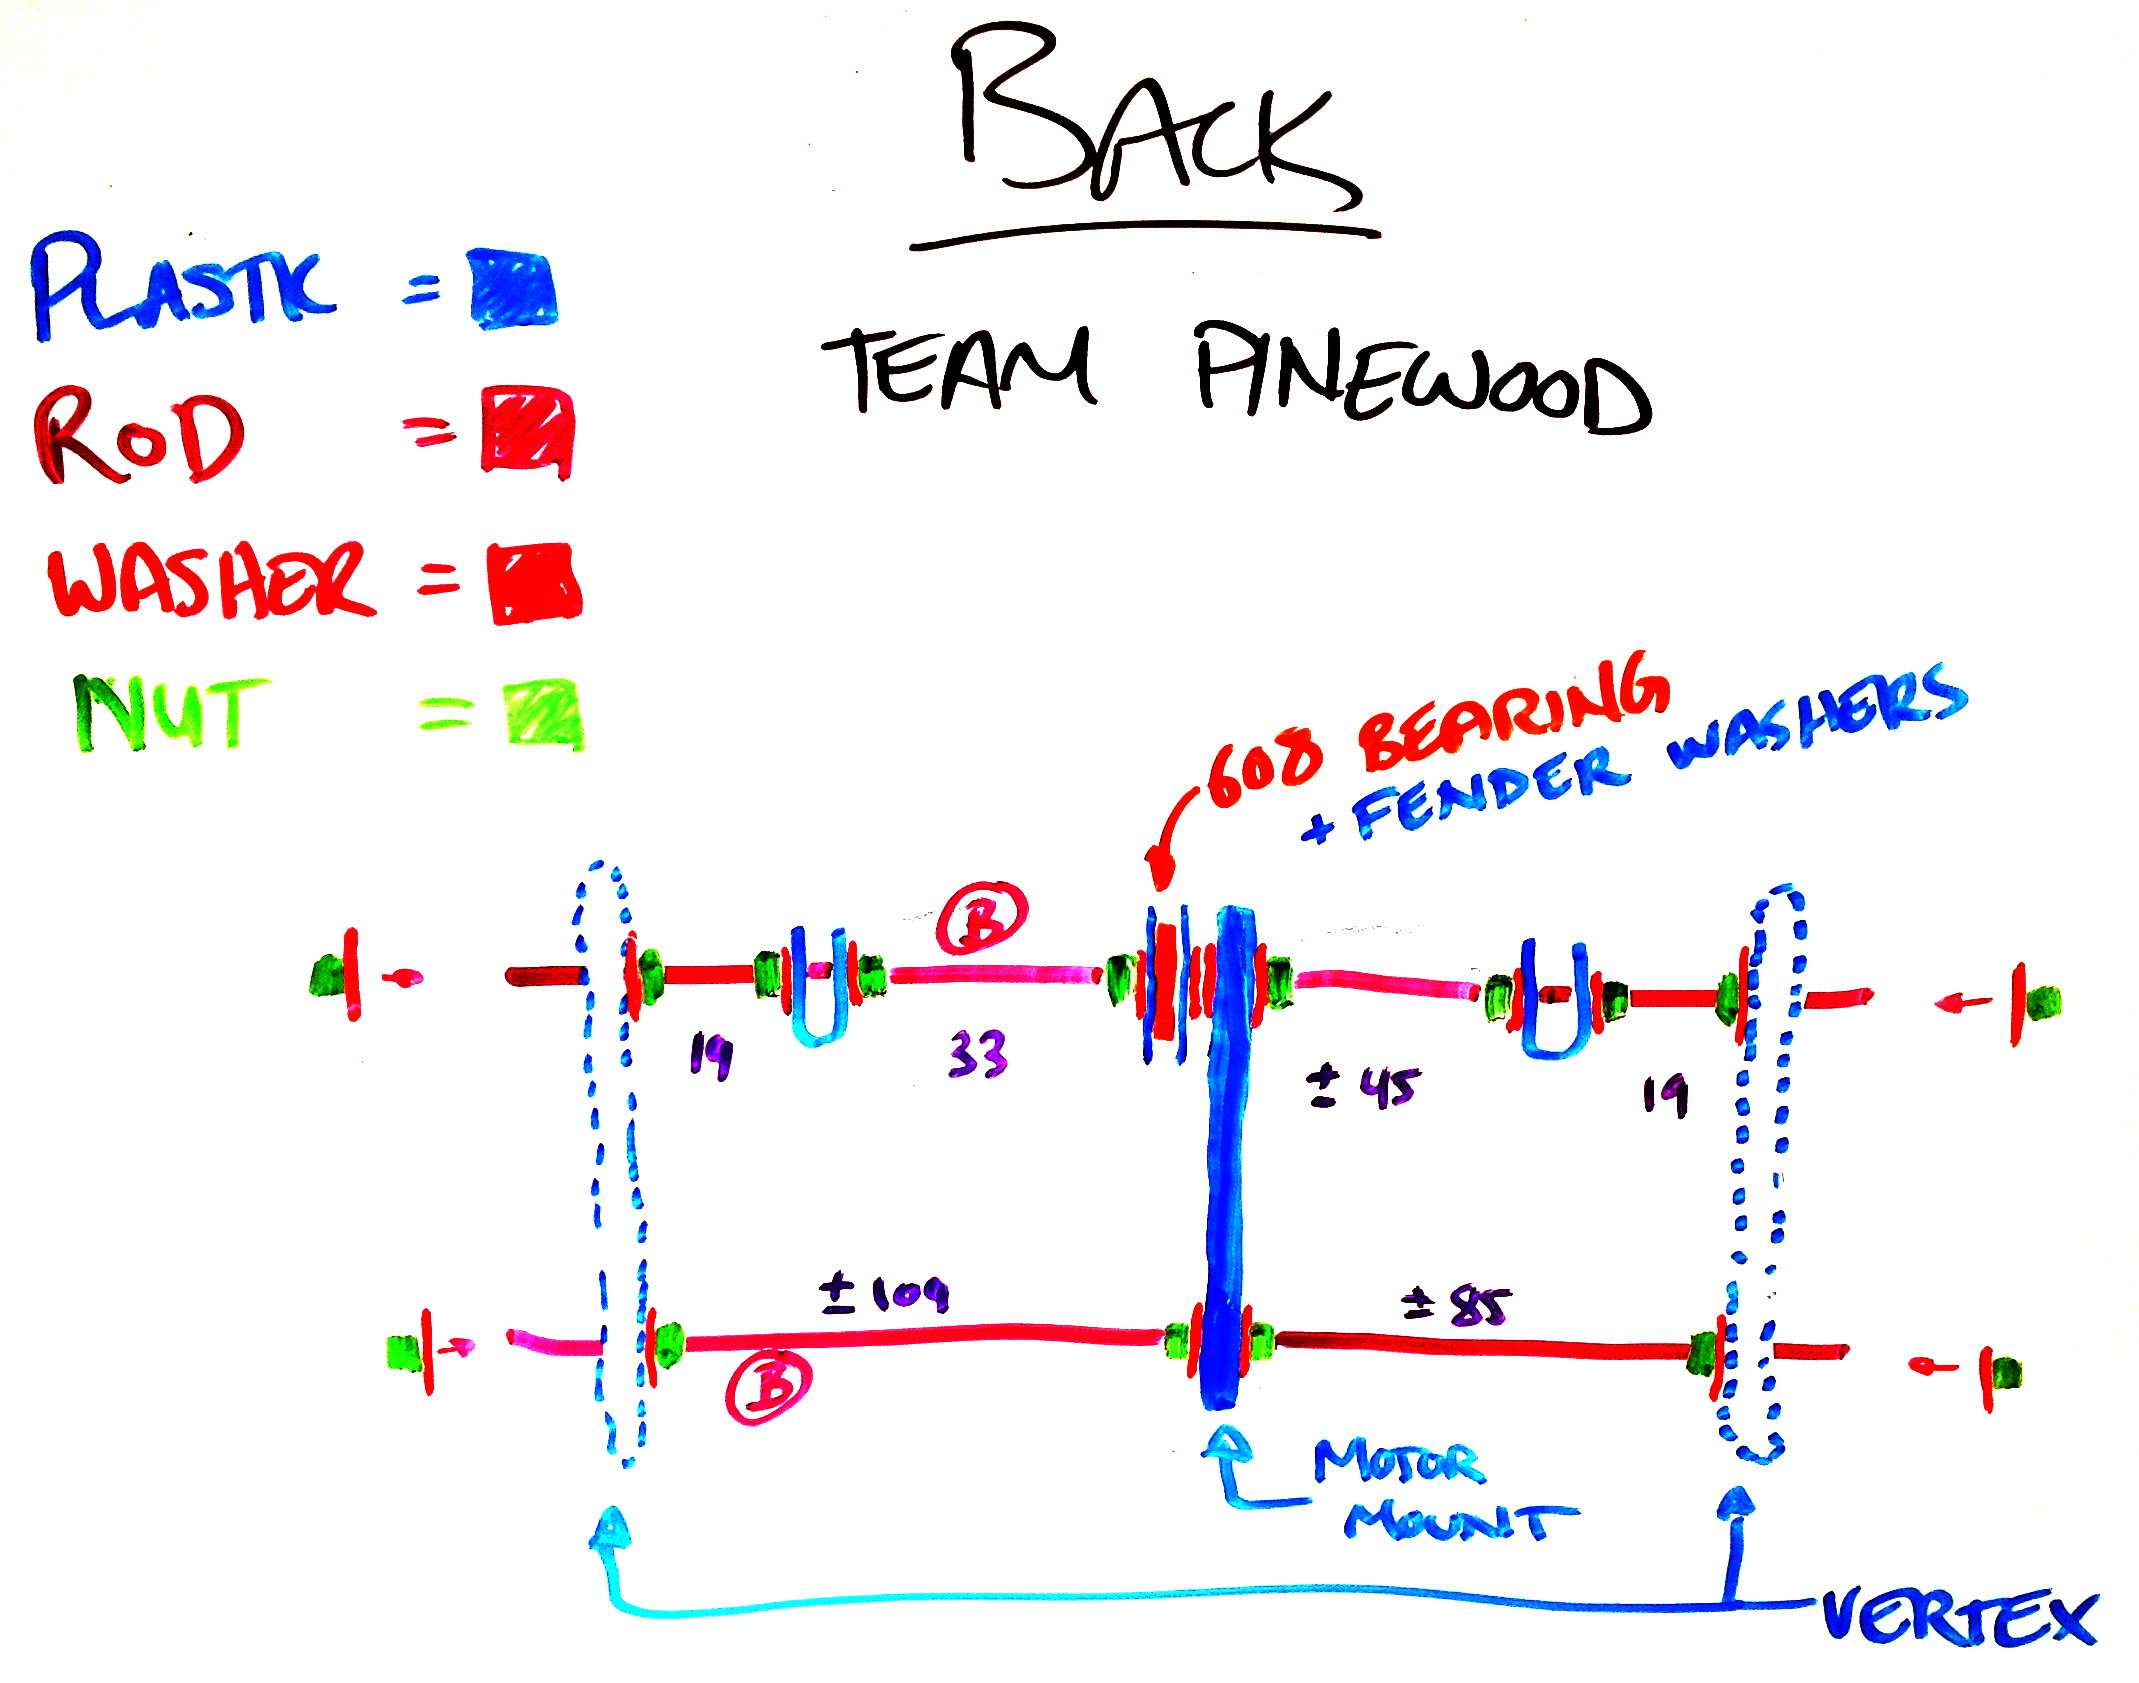
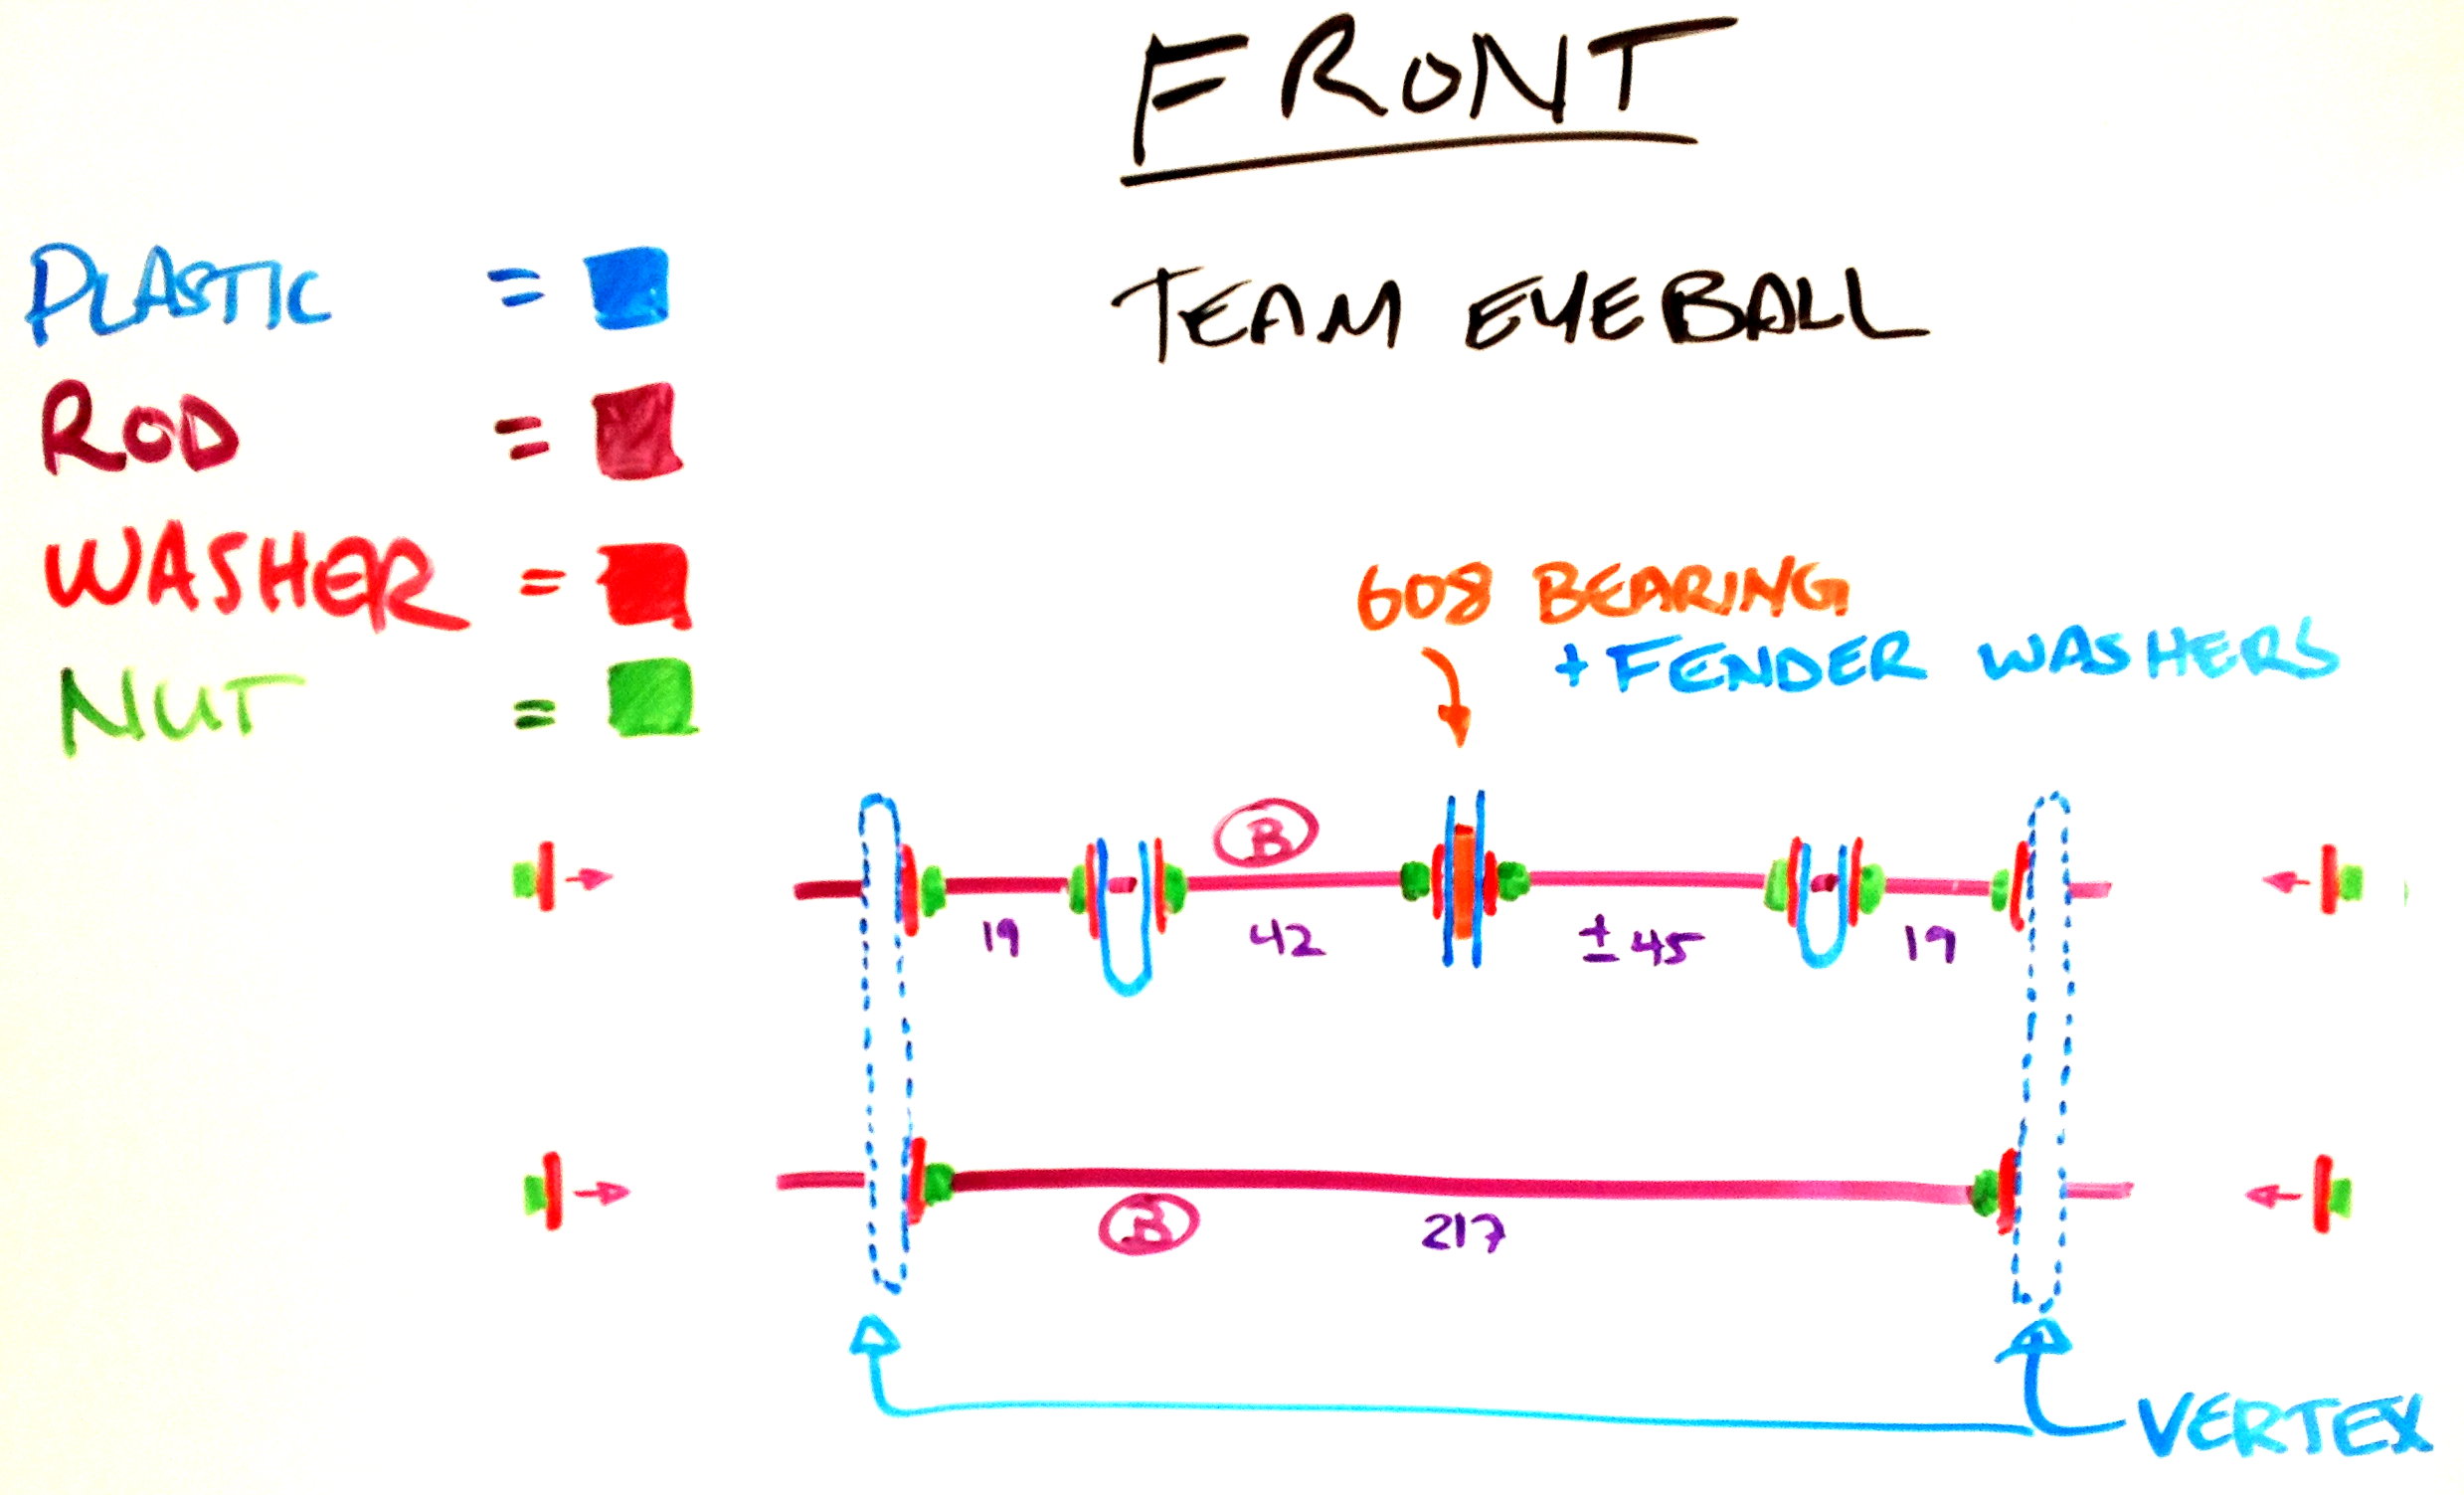
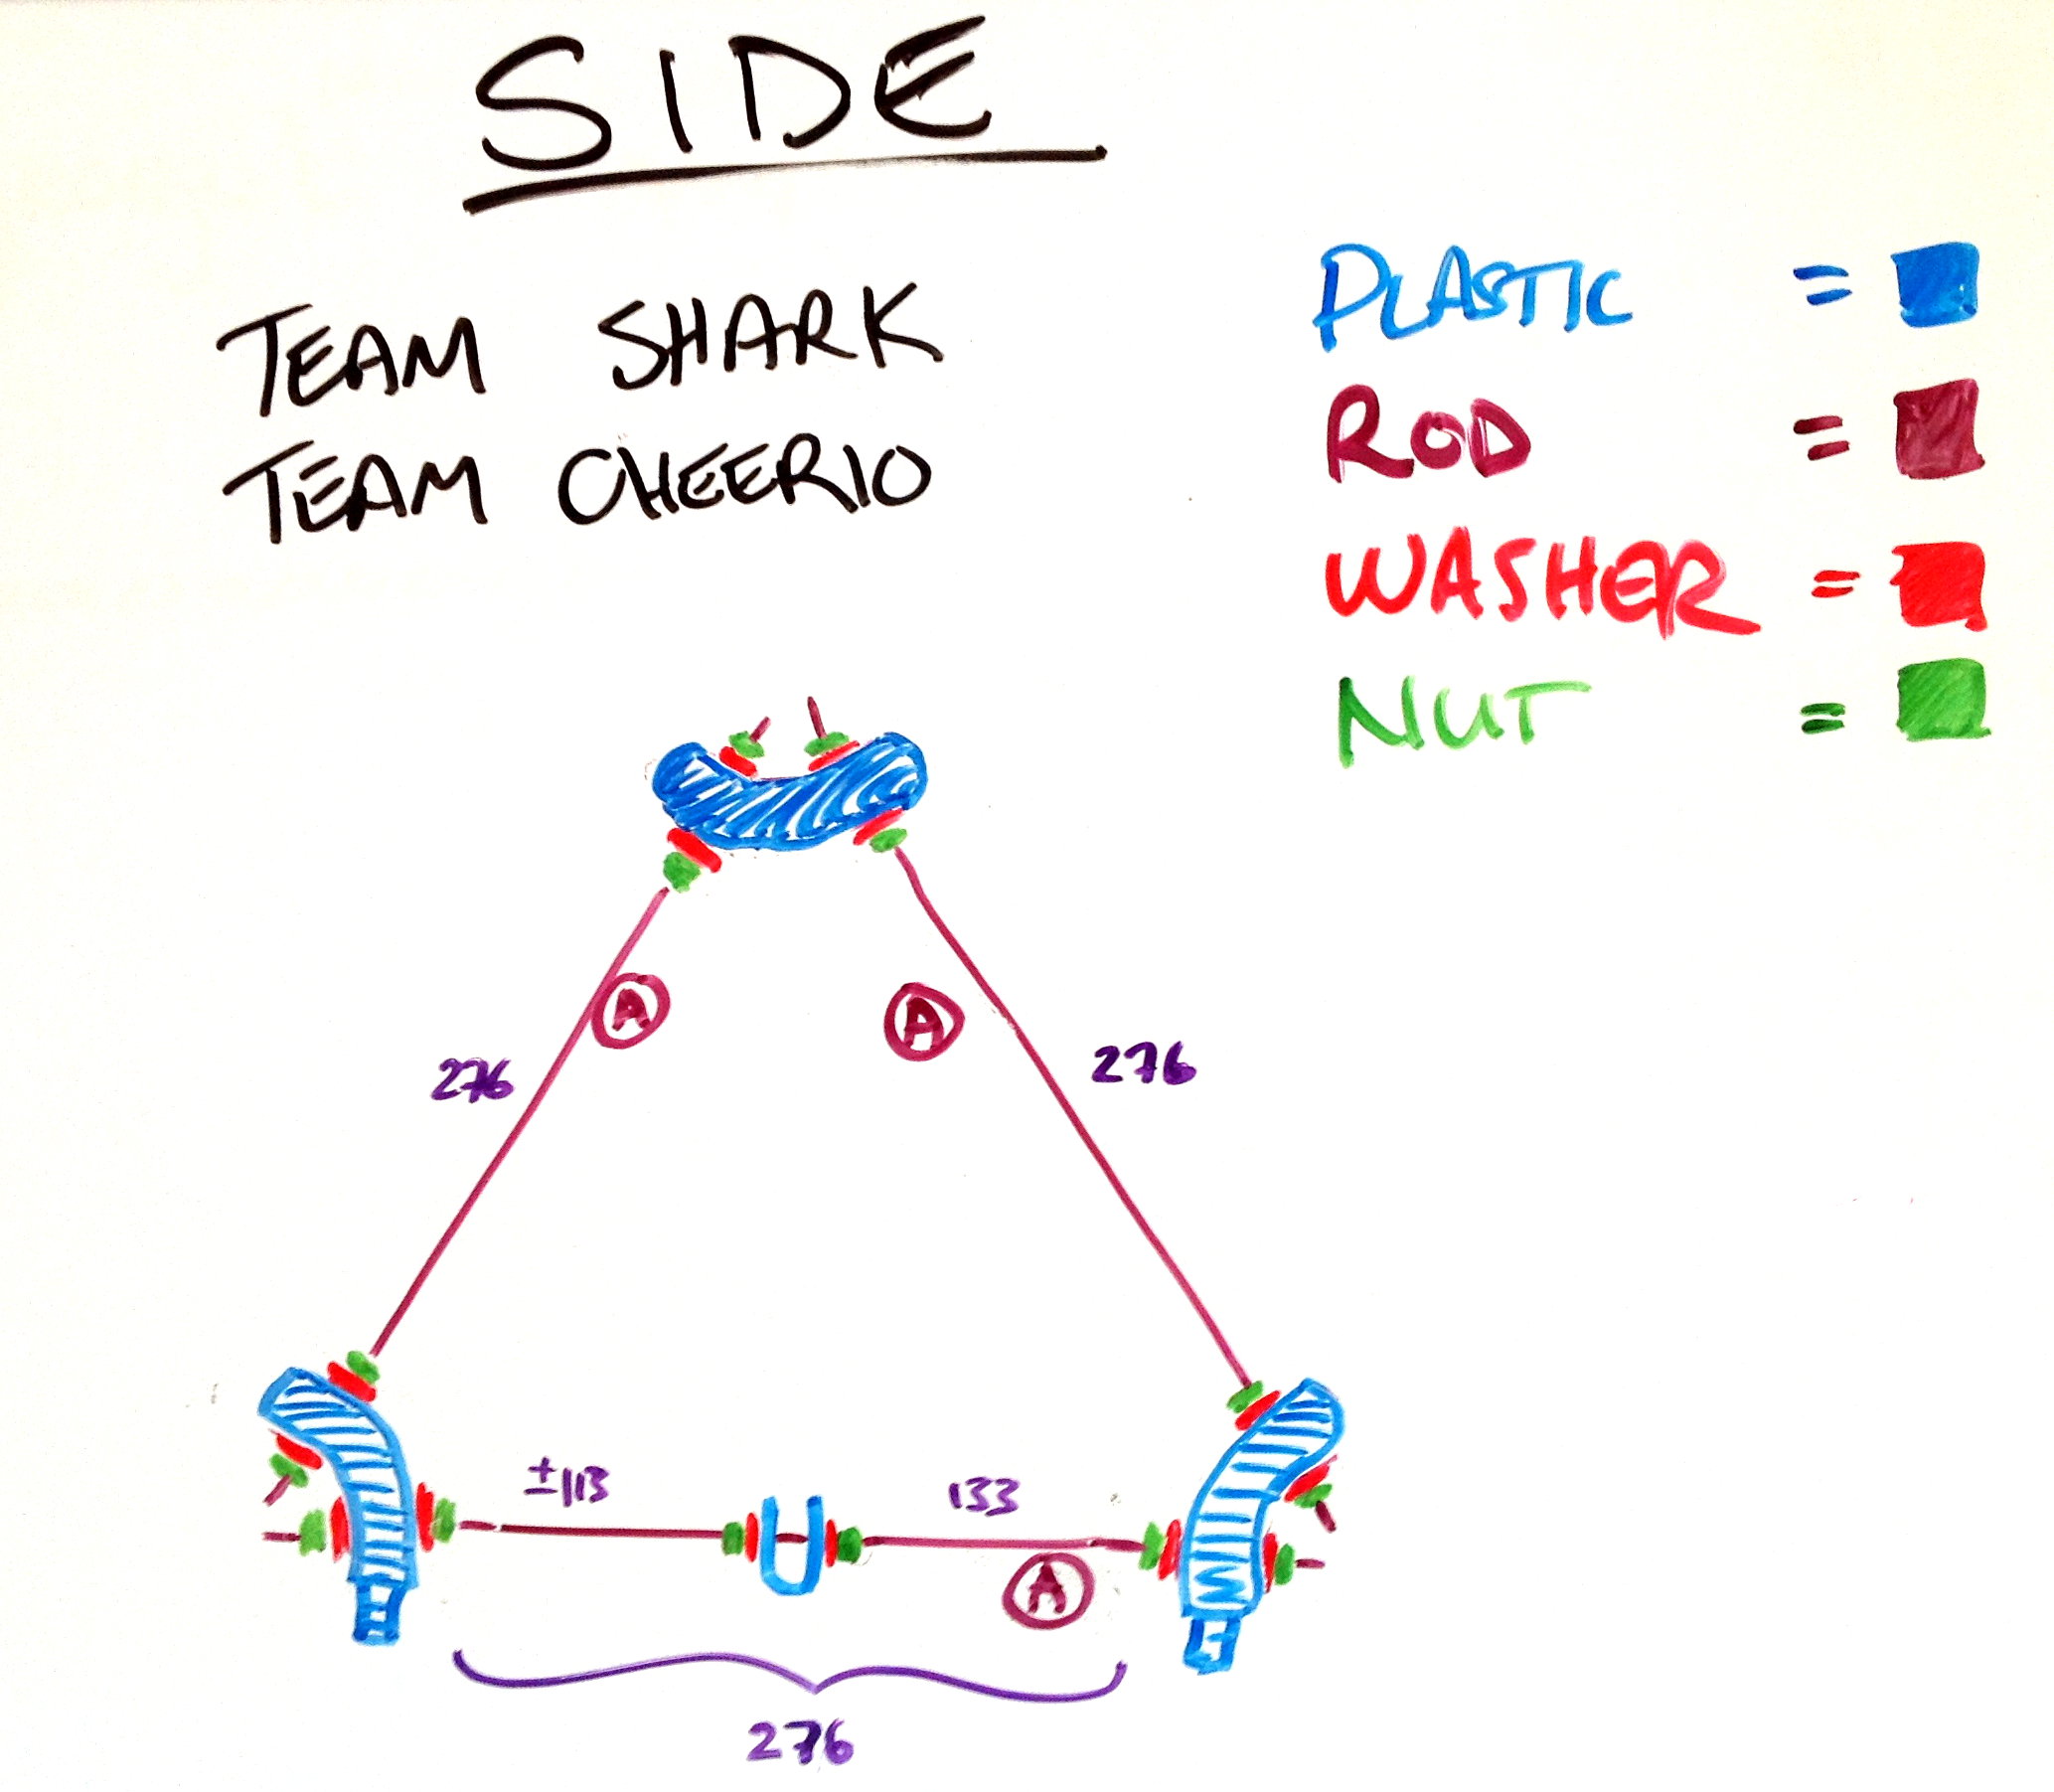
Using a number of different colors, we drew a diagram of how the major frame sections needed to be assembled. We used the diagrams to count out the parts and prepare the kits. In each back we included a copy of the diagram and a photo of what each kit represents on the completed reference machine. The adults were asked to resist the temptation to do any building themselves, and to let the kids explore the parts and make mistakes.
 The threaded rods also needed to be cut — about a dozen cuts were required. Because the rods are critical path, we set up three stations using bar clamps and printed Bar Clamp Rod Adapters and let the kids get started on this right when they came into the room for the meeting. Each length was labeled “A,” “B,” or “C,” and cutting locations were clearly marked with tape. (They had planned out the best fit the meeting prior and marked all the cuts, but I wanted to make it very clear.)
The measurements on the diagrams are made nut to nut, and there’s typically at least one that has a +/- in front of it. I explained to the kids that this one was the less important measurement — that the others took priority, and that this one could vary. To prepare for all the measuring, I also provided each table with a number of these excellent paper rulers (narrow metric).
This was the first day that the kids could really see their teamwork coming together. There was a buzz of activity around the rod cutting stations as teams grokked the diagrams and began to build: “We need another B rod!” and “All the A rods have been distributed!”