
Introduction & the EIA 310-D
Most professional and “prosumer” audio and synthesizer gear conforms to a 19-inch rack specification that has been standardized by a variety of organizations, including the Electronic Industries Alliance (EIA 310-D), and the Deutsches Institut für Normung (DIN 41494). The latter organization, by the way, is where MIDI cables get their other name: the 5-pin DIN. It is the same standard that has been used for decades in telecommunications, computing, and even consumer electronics (which are often the right size, but lack the rack mounting flanges or “ears”). This article will focus on aspects of this standard that are applicable to musicians and recording engineers, and their home studios and professional recording studios. You can use it as a guide when you’re planning your own studio or if you plan to build your own studio furniture. For a step-by-step tutorial on building your own studio furniture, see How to Build a Studio Rack, or for studio furniture design plans, see Purchase Rack Plans.
Rack-mount Gear
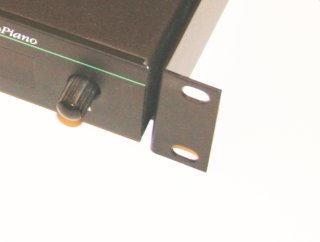
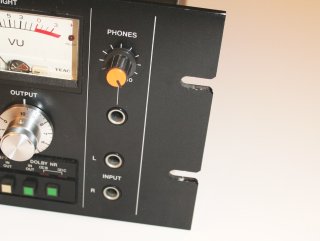
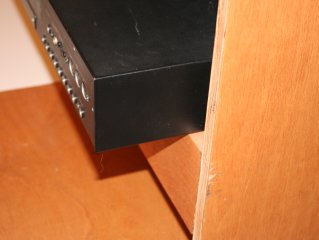
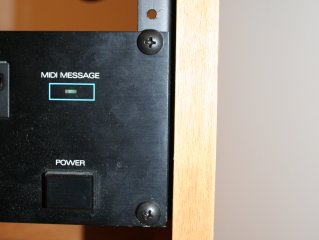
Rack-mount gear is anything that is designed to be installed in a rack. Sometimes rack-mount gear will have telltale rack “ears” (flanges) preinstalled or built into the device, and sometimes these rack ears will be available as an option. In some cases, a piece of equipment might be designed so that it can be fastened onto a rack tray or shelf. The shelf, which has the appropriate mounting flanges built in, can then be installed into a rack. Sometimes equipment mounted onto a rack shelf ends up slightly taller than it should be, which can make for some tight fits.
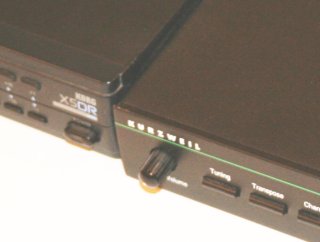
Mounting flanges, or rack ears, typically have either a set of nonthreaded oblong holes drilled in them or a set of notches cut out. The holes or notches are sized to easily fit a #10 machine screw (more on these later), and are spaced so that they line up with at least two rack rail mounting holes on each side.
Mounting notches Although the specifications provide for widths of 19, 23, 24, and 30 inches (48.26, 58.42, 60.96, and 76.20 cm), the 19-inch variety is probably the only width you’ll ever see in rack-mountable audio gear. This means that its width –- including its mounting ears -– can be no more than 19 inches (48.26 cm) wide.
| Width | In | Cm |
| 1/4 | 4 3/16 | 10.64 |
| 1/3 | 5 9/16 | 14.13 |
| 1/2 | 8 3/8 | 21.27 |
| 2/3 | 11 1/8 | 28.26 |
| 3/4 | 12 9/16 | 31.91 |
| Full | 17 | 43.18 |
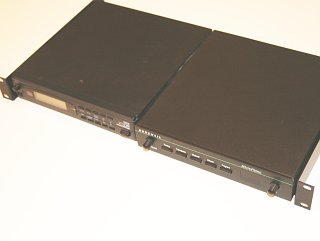
The height of rack-mount gear is always a multiple of 1.75 inches (4.45 cm), and the depth varies widely. Though some rack-mount servers and telecommunications devices can have depths of 33 inches (83.82 cm) or more, most audio equipment isn’t nearly that deep. A good rule of thumb when trying to figure out how deep of a cabinet to build is to measure the depth (from front to back) of the deepest piece of gear, and then add about 4 to 6 inches (10.16 to 15.24 cm) to allow room for cables, power supplies, and air flow. Seen mostly in computer hardware and telecommunications, some deeper and heavier gear is designed to be rack mounted at both the front and back of the unit. Typically, the spacing between front and rear rails is 31.5 inches (80.01 cm). If you have deep, heavy gear, though, it is wise to provide some sort of support toward the back side of the device. For my cabinets, I typically mount heavy equipment at the bottom and support it at the back with a vertical plywood slat, which also provides more structural integrity to the cabinet box itself. See the tutorial at How to Build a Studio Rack for an example.
The Rack Unit (or Modular Unit)
A rack unit is a measure of the height of a piece of rack-mount gear. One unit is 1.75 inches (4.45 cm). The term “rack unit” can also be used to describe the actual piece of equipment that you intend to mount in the rack. In this article I’ll try to be careful about using “rack-mount gear” to refer to the electronic equipment and “rack unit” to refer to the unit of measure.
A rack unit is often abbreviated with “U” and sometimes “RU”, so a 1U effects processor is 1.75 inches (4.45 cm) high. Remember: The unit of measure says nothing about the width of the gear (19 inches [48.26 cm] in the case of most audio gear) or its depth, which can vary widely.
| U (or RU) | In | Cm |
| 1 | 1.75 | 4.45 |
| 2 | 3.50 | 8.89 |
| 3 | 5.25 | 13.34 |
| 4 | 7.00 | 17.78 |
| 5 | 8.75 | 22.23 |
| 6 | 10.50 | 26.67 |
| 7 | 12.25 | 31.12 |
| 8 | 14.00 | 35.56 |
| 9 | 15.75 | 40.01 |
| 10 | 17.50 | 44.45 |
| 11 | 19.25 | 48.90 |
| 12 | 21.00 | 53.34 |
| 13 | 22.75 | 57.79 |
| 14 | 24.50 | 62.23 |
| 15 | 26.25 | 66.68 |
| 16 | 28.00 | 71.12 |
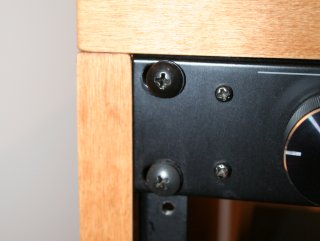
Rack Rails & Screws
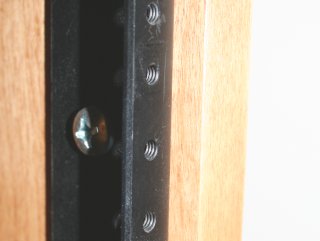
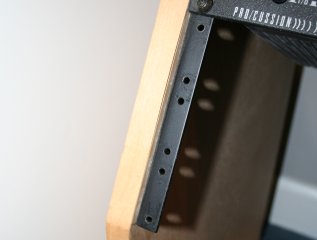
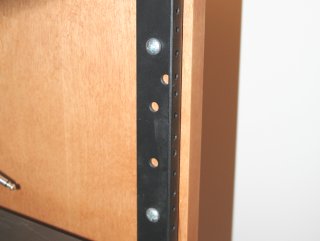
Rack rails are the hardware used to hold rack-mount gear in place within an equipment rack. Though rails can be made of just about any material (including wood or plastic), they’re usually made from 11-gauge steel, which is about 0.125 inches (0.318 cm) thick, and bent to form an L shape. The side that holds the gear is typically 0.625 to 0.75 inch (1.59 to 1.91 cm) wide, and the side that gets mounted to the inside of the cabined is typically about 1.25 inch (3.18 cm) wide.
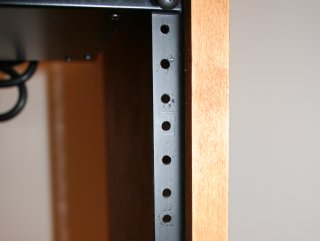
Steel rack rails have a set of mounting holes that usually conform to the EIA standard so that they match up nicely with the holes (or notches) in the mounting ears of rack-mount gear. The distance from one hole to the next is the repeating set of 5/8 inch (1.59 cm), 5/8 inch (1.59 cm), and 1/2 inch (1.27 cm), on center, and the first hole is 1/4 inch (0.64 cm) from each end of the rail. In other words, from the end of the rail to the center of the first hole is 1/4 inch (0.64 cm). From the center of the first hole to the center of the second is 5/8 inch (1.59 cm). From the center of the second hole to the center of the third is also 5/8 inch (1.59 cm). And, from the center of the third hole to the center of the fourth is 1/2 inch (1.27 cm). Then the pattern repeats –- from the center of the fourth hole to the center of the fifth is 5/8 inch (1.59 cm) again.
It’s important to note that some rails on the market do not conform to the current standard, making it impossible to mount some gear. When you buy rails, be sure they have all the right holes –- including holes that allow you to mount the rails to the cabinet.
The mounting holes in steel rack rails should be pretapped (prethreaded) for 10-32 machine screws. The “10” (or #10, spoken “number ten”) is the common name for the screw, and the “32” means that it has 32 threads per inch. You might also see the acronym UNF used to describe these screws (e.g., #10 UNF) –- this just means that it’s a fine thread as opposed to a coarse thread. For example, a 10-24 screw is UNC (coarse thread), and a 10-32 screw is UNF (fine thread). You want the 10-32 (UNF). Fortunately, you can get these screws just about anywhere screws are sold, including your local home center. They come in a variety of lengths. But, I suggest buying a bag of screws specifically designated as “rack mount screws,” because they’re typically a higher quality, have a nice black finish, and often include nylon washers to help protect and isolate the gear you’re installing.

Steel rails have another set of pre-drilled (non-threaded) holes that can be used to mount the rails to the inside of the rack cabinet.
Steel rack rails are usually sold in pairs and in multiples of 2U, and the rack unit is used to specify the actual length of the rails. You can use the chart above to find the actual length of the rails. For example, when you purchase a set of 10U rack rails, you’ll be getting two 17.5 inch (44.45 cm) rails.
If you’re on a budget, you can also make your rack rails out of wood and use wood screws to hold the gear in place. To do this, use strips of a hard hardwood (such as white oak or maple) and pre-drill holes for the screws so you don’t split the wood. Be sure to use wood screws to mount the gear – Wood screws are not threaded all the way up to the head, which means the part of the shaft that supports your gear will be stronger. They’re also designed to hold well in wood. (By the way, not all hardwoods are hard – e.g. balsawood – so be sure to stick to the good stuff. Using Ipe or Ironwood is probably overkill.)
Another good money-saving tip is to look for clearance specials on longer rails, and saw them in half with a hacksaw. Longer rails don’t often sell as well as shorter ones, so every once in a while you’ll find a blowout deal on them. After a few minutes with a hacksaw, you’ve saved yourself quality cash.
You might also see square-hole racks, which are also more common in telecommunications and computer hardware, and other types of rack fasteners, including cage and clip nuts (for square-hold racks), knurled knobs, and quick-release type bolts.
Internal Width
The important thing to consider when designing a rack is that 19-inch (48.26 cm) rack-mount gear is up to and including 19 inches (48.26 cm) wide. This means, of course, that the internal dimension of your enclosure should be no less than 19 inches (48.26 cm). If it is exactly 19 inches (48.26 cm), the gear –- if inset and designed properly -– will fit very snugly, with no room for play. Moreover, an enclosure that has an internal width of exactly 19 inches (48.26 cm) doesn’t exactly meet the standard specification because there’s no tolerance in the measurement, and, for most steel rack rails, the rails will be just a hair too close together.
To meet the standard, the rails themselves must be 17.75 inches (45.09 cm) apart (horizontally), and the centers of the mounting holes must be 18.31 inches (46.51 cm) apart. The mounting holes in steel rails are commonly 13/32 inch (1.03 cm) from the mounting edge, so if you do the math, the internal diameter works out to be 19.1225 inches (48.57 cm), which “rounds up” nicely to 19.125 (19 1/8) inches, or 48.58 cm. This will give you 1/8-inch (0.32 cm) of side-to-side play when mounting your gear. Additionally, the mounting flanges of steel rails are commonly 21/32 inches wide, which provides a rail-to-rail separation of about 17.8 inches (45.24 cm) at an internal width of 19.125 inches (48.58 cm) –- a separation that conforms to the standard.
What does all this mean? It’s best to design your cabinets with an internal width of 19.125 inches (48.58 cm). That said, I’ve done a lot of cabinets with an internal width of exactly 19 inches (48.26 cm) and haven’t run into any serious problems; Wood is far more forgiving that steel, especially when you’re talking about such small measurements.
Here are a couple of other noteworthy measurements: It’s important to note that 3/4-inch plywood (or OSB) is not really 3/4 inches. It’s actually 23/32 inches (1.83 cm). Particleboard or MDF (medium density fiberboard) doesn’t have this problem.
Mounting the Rails
There are a number of different ways to mount the rails to the cabinet. One of the most solid methods is to use T-nuts and bolts. Drill holes for the T-nuts, and place them into the holes from the outside of the cabinet. Then thread the bolts through the rail (using washers if necessary) so that they meet the nuts. Tightening the bolts will pull the nuts in for a solid fit. The downside of this, of course, is that the nuts will be visible from the outside of the cabinet.
Another option is to use sheet metal screws, which (unlike wood screws) are threaded all the way up to the head. If your cabinets are made of 3/4-inch plywood, you can get away with 3/4-inch screws because the thickness of the rails will prevent the screws from breaking through the wood. For most racks, I usually use one screw for every 2U, but no less than two screws per rail.
Most electronic equipment can be safely mounted at an angle, but be sure to check the equipment manuals for mounting requirements –- especially if the equipment has moving parts, such as a hard drive.
I usually like to set the rack rails in about 1/8 inch (0.32 cm) from the front of the cabinet because it helps to bring the faces of the devices flush with the edge of the cabinet. (They’re not always flush because rack ears aren’t always a standard thickness.) If you’re considering adding doors, you might even set them in even more. If you’re using steel rails you have yet another option: You can build the cabinet narrower and turn the rails around so they point away from each other –- so that they essentially wrap around the edge of the cabinet. This will save you a bit of space and look a little more industrial or utilitarian.
Resources
- Recording Studio Workstation & Rack Plans – Studio furniture you can build yourself!
- How to Build a Studio Rack – A step-by-step tutorial for building a custom studio keyboard stand and equipment rack on a tight budget with seventh-grade-shop-class skills, and without having to handle any dangerous saw blades.
Great and informative, easy and simple article.
Just what i was looking for.
Thanks!