
Now through Jan 4 2025, use code NY25-20 for 20% off!
Visit the Purchase Rack Plans to order.
The Goal
My original goal here was to better organize part of my home studio by building custom-fit studio rack furniture to house two of the keyboards (Ensoniq TS-12 and Roland D-20), studio monitors (speakers), and about 14 rack units worth of gear. When finished the keys of my larger keyboard should be 28 inches (711mm) from the ground (like a grand piano). Small footprint and quick & easy construction. Target price: less than US$100.
Note: The studio rack furniture I had built previously provided for a U-shaped studio design, which simply would not fit in the apartment (flat) we were moving to. This one takes up only as much space as absolutely necessary.
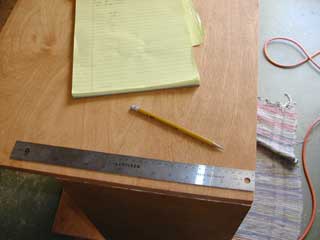
Tools? Drill, screwdriver, a couple of dowel hole alignment markers, and rubber mallet (optional). That’s it. Literally. =)
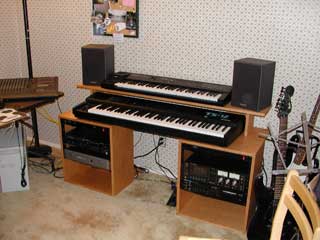
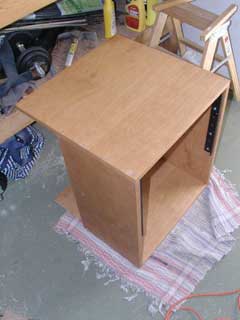
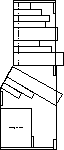
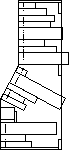
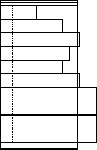
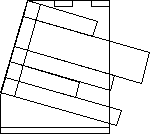
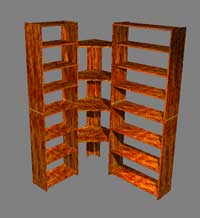
Before we get started, let me show you how it ends. Below is the completed furniture. (Excuse the ugly wallpaper — it’s not our fault.)
The Design
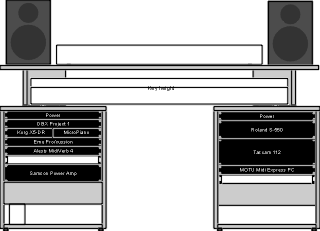
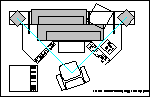
After measuring all the equipment, I settled for a design using two floor boxes each holding eight rack units with space at the bottom for “stuff.” My keyboard controller, the weighted-key TS-12 straddles the two boxes and another thin shelf (bridge) sits above it to hold my old D-20 and the speakers. This design also allows the width of the unit to change based on personal preference and makes the piece easier to transport– important because I was about to be moving cross country. (Why was I building furniture right before a big move? My wife didn’t know either. . . .)
The rack openings are 19 1/8 inches wide (486mm), which allows an oh-so-tiny bit of play side-to-side. I used to build racks with 19-inch (483mm) openings, which meant a tight, clean finish, but no room for error. The choice is yours. For more information about rack standards, including photos, see All About Racks & Rack Rails.
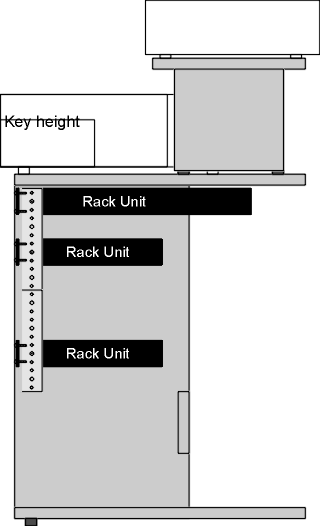
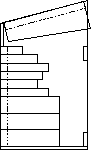
On the side view you can see I left room to stick my head in behind the base units and fiddle with wires. There’s also a back brace that doubles as a support for deep and heavy rack units (like my sampler). The piece is not at risk of tipping over, because the bottom board extends back the full distance and the TS-12 provides a lot of weight over the front. (Note: The back feet somehow didn’t make it into this image, so just pretend they’re there — they look just like the front feet but they’re in back. =)
Made from 3/4-inch (19mm) cabinet-grade plywood, this piece is quite solid and stable. And it looks good, too.
I have several other designs with detailed plans available online, too. Lots of do-it-yourselfers, and a few complete novices have built these pieces successfully. For more information, see Recording Studio Workstation & Rack Plans. Here’s some of what’s available:
The Plywood Sheet
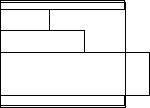
All the pieces fit nicely onto a 4-foot by 8-foot sheet of plywood (1220×2440 millimeters). You can get these sheets of plywood for as little as US$20 if you’re not concerned with quality. I chose “cabinet grade” birch plywood with two good sides for US$55. Birch stains nicely, and it’s easier to find matching edging tape (more later). Download the plans for the most current version of this layout.
The cabinet-grade plywood was a bit of a splurge — I could have saved a bundle by using a lower grade or less expensive “generic” plywood . . . . or even particle board or MDF for that matter, but I strongly recommend plywood instead. It’s sturdier, doesn’t bend as easily, and holds screws MUCH better. It also looks a lot nicer when finished.)

Since I prefer to have someone to blame when something goes wrong, I had the wood milled at the place where I bought it. Milling wood is very precise and costs about US$1 per cut, plus there’s usually a set-up fee. It’s only offered at some lumber yards so be sure to ask before you buy. Cutting out these pieces totaled US$20.
The Parts
| 1 | 4×8 3/4-inch Birch Plywood I could have saved more than $30 here if I settled for a less “premium” wood! | $54.98 |
| 1 | Plywood Millwork | $20.00 |
| 1 | 50-ft Birch Wood Tape (Edge Banding) (I used about 30 ft.) | $9.94 |
| 1 | Sandpaper | $2.91 |
| 1 | Set of 16-space Rack Rails (Blow-out price at Guitar Center! A little hack-sawing and I had 2 sets of 8-space rails.) | $.99 |
| 1 | Package 1/4-inch Dowels | $1.69 |
| 12 | 3/4-inch Felt Pads | $1.97 |
| 9 | Adjustable (Leveling) Furniture Feet | $5.74 |
| 16 | #12 3/4-inch Sheetmetal Screws | $1.78 |
| Box of 100 | 1.5-inch Wood Screws | $4.39 |
| TOTAL (USD) | $104.39 |
So, about US$5 over budget, plus tax — but I used a nice birch plywood, so if I really wanted to cut corners I could have built it all for about US$75. Plus now I have extra screws, dowels, wood tape, felt pads, and sandpaper left over for my next project. I already had the wood stain, so I didn’t add that in to the total. (NOTE: Mega-stores like The Home Depot tend to have lower prices than smaller stores, but they usually do not have milling services.)
Where do you go to get these parts? Ask your local hardware store if they provide precision milling services. If not, ask them to refer you to a place that does. Buy the plywood at the same place you get it milled, but you’ll probably want to buy all the other hardware at The Home Depot or a similar home center or mega-hardware store — they tend to have great prices since they’re bent on putting local hardware retailers out of business.
Finally you can pick up the rack rails at a local Guitar Center, online at Musician’s Friend, or see if you have a local pro audio store nearby. I happened to find an amazing deal on the rails — usually rails come in 2, 4, 10, 12, 16, and 18 spaces (not 8) and range in price from US$3 to US$27. To make two sets of 8-space rails, buy a set of 16-space rails for about US$25 and cut each side in half with a hack saw. You can get a cheap hack saw for about US$5, and it only takes a minute to make the cut — it’s actually a lot easier than you might think. For more information about rack rails and standards, see All About Racks & Rack Rails.
You can get good deals on rack rails from stores that supply computer hardware rack-mount accessories, or check Amazon.com to see what’s available. You can also often find standard 17-inch rack rails on ebay for about a buck-a-U (for example, a pair of 16-space rails for $16).
Preparing the Pieces
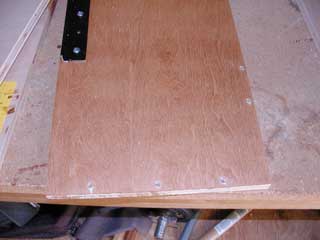
The first thing I did was judge which pieces would go where — including which sides were most presentable. I marked each piece with its location and orientation with a piece of masking tape. An example marking is “Left Base Unit, Left Side. up-^, forward->, (out)” which tells me that the piece is the left side of the left base unit. The side with the tape should be facing out, and the “up” and “forward” arrows indicate orientation.
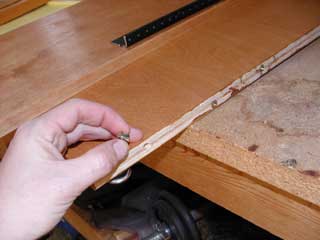
Next I ran wood tape (edge banding) across all the visible edges. Edge banding is a great invention because you just iron it on to the edges and then trim off the excess. It sticks forever — or at least for more than 10 years (when I started making this stuff).
If the banding starts to peel up in places before the glue has dried, simply put a piece of paper over the edge to protect the wood, then “clamp” the edge banding down with a piece of masking tape.
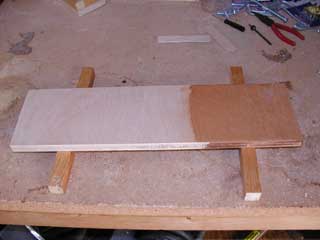
Finally, I chose to sand and stain the wood. I found it easier to stain the wood before assembly. Staining is easy — just rub the stain on, then wipe it back off again and let it dry. Your hands will get messy and so will your clothes, so it’s a good idea to wear gloves and be. Also, be sure to properly dispose of the rags — they can spontaneously catch fire if you’re not careful. (Edge banding, by the way, tends to be a little blotchy when stained.)
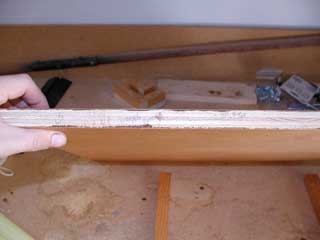
I rewrote the piece names and orientations on an edge that would not be visible on the finished product.
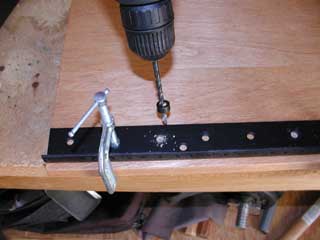
Installing the Feet
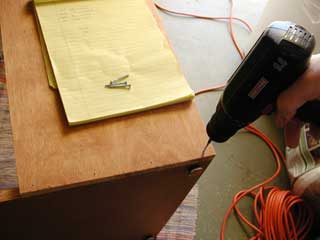
Install the adjustable-height feet by first drilling a hole and then inserting a plastic fitting that’s threaded on the inside so the feet can turn and go in or out. I measured carefully so the feet would be 3/4-inch (19mm) from each bottom edge (the hole had to be 1 1/4-inch (32mm) from the edge because each foot had a 1-inch (25mm) diameter.
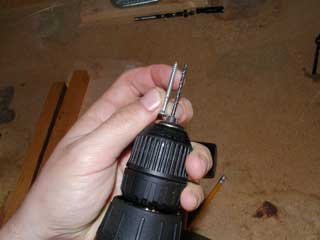
Be careful not to drill through the board! I used a depth stop just to be safe. You can see it attached to the drill bit in the photo with the drill just below. Another common trick is to make a depth gauge by simply wrapping a bit of tape around the drill bit at the depth you want — just be careful that the tape doesn’t slide up the drill bit as you drill more holes.
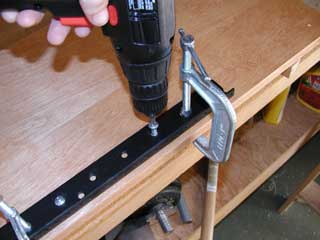
Installing the Rack Rails
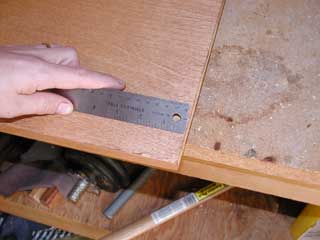
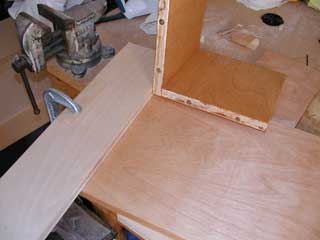
To install the rack rails I slid them up to the very top of the side piece, and inset them 1/4 inch (6mm). I could align the rails accurately with the help of a scrap board placed at the top edge of the side board (as shown in the photo) and a couple of C-clamps.
Be sure not to directly clamp your good wood! I use pieces of wooden paint stirring sticks or other scraps of wood as a buffer to protect the workpiece from the clamps when necessary.

Tighten the clamps gently, then nudge the rack rail around until it’s in the perfect position, then tighten the clamps to secure the rack rail in place. Predrill the holes with the rail in place (again using a drill stop so you don’t go through the board) and use the thickest 3/4-inch (19mm) screws that will still fit through the holes on the rails. I used #14 sheet metal screws. (Sheet metal screws are threaded all the way to the head of the screw, which I like in this case for extra holding power.)
I used four screws to fasten each rail.
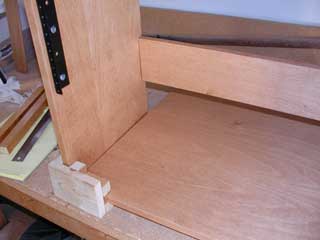
While I was at it I marked exactly where the top of the back board was to fall. This board serves two functions. First it stabilizes the piece when there are no rack units installed. (This was important to me because the pieces will be supporting two expensive keyboards, regardless of whether or not they’re filled with gear.) Second, the board can provide additional support deep and heavy rack units installed at the bottom of the rack rails. A deep and heavy piece will extend beyond the 12-inch (305mm) wide sides and will lay nicely on that supporting beam.
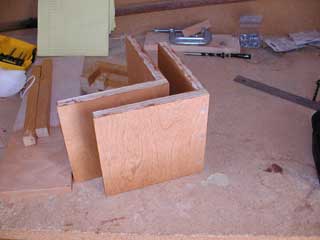
Assembling the Base Units
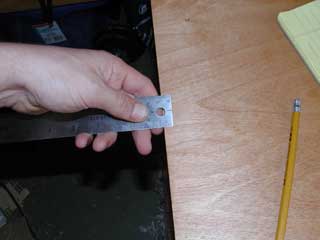
Because the weight of the rack gear, keyboards, speakers, and shelf will all fall on the joints connecting the sides of the base units to the bottoms, it’s crucial that it be as strong as it can be. For this reason I planned to use wooden dowels, wood screws, and even L-brackets to strengthen the joint. (I later determined that the L-brackets were not necessary.)
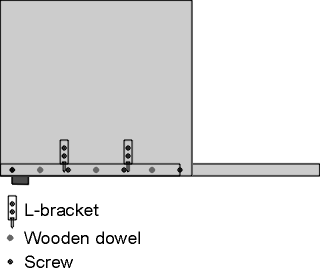
It’s a bit difficult to see, but the placement of the wooden dowels and screws alternate in the image above: four screws and three dowels.
Start by drilling the holes for the dowels into the edges of the plywood, both on the bottom board and the back support board. You’ll want to drill into the edges first because the nature of plywood (layers of various densities and types of woods) make it much more difficult to position the hole accurately. Often the drill bit will slip a bit and end up going into a softer layer of wood than the center layer. (This is okay unless the bit comes out the side!)
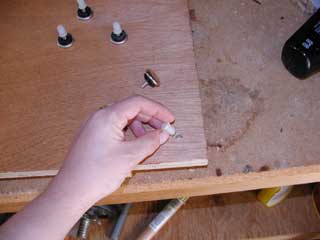
Drill all the holes for the dowels then insert metal dowel pins (or dowel alignment markers). When the board with the dowel pins is pressed up against the board it will be fastened to, you’ll get small indentations marking exactly where the corresponding hole should be drilled. (Again, use a drill stop set at about 1/2 inch (13mm) to be sure you don’t go through the wood.) When you press the boards together to mark the corresponding holes, use scrap pieces of wood to help align the boards (such as is shown in the Rack Rails section).
You’ll end up with each side having five holes that correspond perfectly to where the dowels will be.
If you’re using the standard 1 1/4-inch (32mm) dowels, sink them 3/4 inch (19mm) into the edges of the backs and bottoms of each base unit. You can add a couple drops of glue first if you want, but I don’t think it’s really necessary.
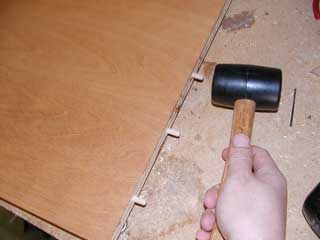
Then attach the sides. You’ll probably find it easier to have an extra set of hands for this part. First attach one side to the bottom, then attach the back piece to that same side. Ask someone to hold those two pieces up for you while you attach the second side. If the dowels don’t seem to fit right away, then just keep trying — perhaps by lining up a different dowel first. Even if they’re off a little you can usually get a good fit. Wood is forgiving!
Once you have the base together (except for the top), set it on its side on an old towel or carpet. Press down firmly on the other side to be sure it all fits together. If there’s a gap that just won’t budge, you may not have drilled enough room for the dowel, or the dowel may be badly mis-aligned. If this happens, find the offending dowel and just redrill it — or move it over slightly to one side or the other.
Adding the Screws and the Top
I used four screws on each joint. Space the screws out evenly for a nice finished look, and be sure you’re not intersecting pieces of hardware. In other words, there’s not much point drilling a screw in through where the dowel went, or worse yet, hitting the threaded metal feet with a screw you put in from the side.
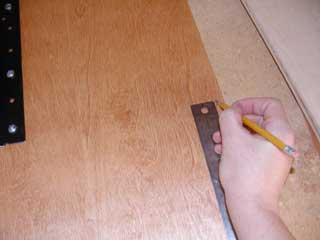
Measure carefully and mark with a pencil where the screws should go lengthwise across the joint. For a 12-inch (305mm) joint, I put the screws at 3/4″, 4 1/4″, 7 3/4″, and 11 1/4″ (while the three dowels were at 2 1/2″, 6″, and 9 1/2″). In metric units, that’s 19mm, 108mm, 197mm, and 286mm, with the three dowels at 57mm, 152mm, and 241mm.
Next go back and be sure your dot is exactly 3/8″ (9.5mm) from the edge since this will land your screw right in the middle of the 3/4″ (19mm) plywood edge. I usually dent the wood with the pencil tip to make a starting point for the drill bit. Remember to wear safety goggles — a pencil point (or wood or anything) will hurt when it hits your eyeball.
There are two pieces of wood you’re joining here — the one the screw is going through, and the one the screw is anchoring itself into. You should always predrill your holes in the “anchor board” with a drill bit that is the diameter of the core of the screw (without the threads). This makes it a lot easier to place the screw and protects against splitting the wood. Ideally, you should predrill the “through board” with a bit the same diameter as the shaft of the screw nearest the head. (Wood screws have a point, some threads, a shaft, and then the head.) If you do this, then the boards will “pull together” as you tighten the screw. I’d venture to say, that it’s not completely necessary, though, if you can manage a tight fit when you go to sink the screw. (I usually put my knee up on the board to be sure the wood is pressed together firmly.)
In any case, to predrill, set the depth of the drill bit to the length of the screw, make sure the joint is firmly seated, and drill the holes.
After the holes are drilled, the screws should drive in quite easily. “Dry fit” the pieces by pressing them together firmly and making sure the pilot holes line up. Then when you’re ready to join the boards forever, run a bead of yellow glue along the joint if you want (not essential), and start fastening the boards. Be sure the pieces are pressed together firmly. It’s hard to re-do this part if you mess up.
You can attach the top of the base units with screws in the same fashion. I didn’t use dowels for the top because the board sits atop the side pieces, which provide ample support for the weight of the gear.
Do one side at a time and the pieces should line up just fine. It’s okay if it’s a little bit off; just nudge the pieces into the correct position before you drill the holes and plant the screws. When the base is finished, check to make sure it sits evenly on all four feet, and adjust the foot height if necessary.
Repeat the process to build the second identical base rack.
The Shelf (Bridge)
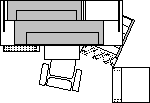
I designed the keyboard bridge to fit snugly around my Ensoniq TS-12 without interfering with the cable placement in back. The shelf is deep enough to support the feet of the top keyboard and long enough to hold the top keyboard and the speakers. It was designed to overhang the bottom keyboard by a few inches (centimeters) while still allowing someone seated at the keyboard to clearly see all the buttons and displays.
I used three screws each to fasten together the legs of the shelf in much the same way that I fastened the sides of the base units.
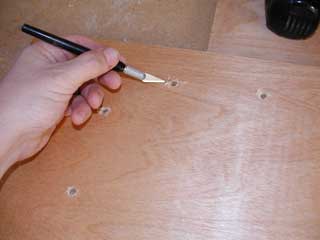
I planned to use dowels to attach the legs to the under side of the shelf, so I drilled four dowel holes into the edges of each leg first. After inserting the dowel pins into the edges, I used another piece of scrap wood and a C-clamp to ensure accurate positioning before I pressed down to make the drill marks.
After drilling the dowel holes into the bottom of the shelf, I touched them up a bit with an Exacto knife to remove the splinters. (Remember to use a drill stop or depth gauge.) Yes, that “Exacto knife” part is totally unnecessary and is a clear illustration of my OCD. =) After all, these holes are going to be covered right up! Why on Earth I felt like they needed to be “cleaned up,” I have no idea!
I then assembled the shelf using just the dowels to hold the pieces together. I can remove the legs if necessary for easier transport. On the bottom of each shelf leg, I stuck a felt pad. Since the shelf will sit “floating” on the two base units, the felt pads will help protect the base unit from bumps and scratches.

The Result
Now I have a brand new, space-saving piece of home studio furniture designed and built to my exact specifications. And it only cost me US$105.
The alternative would have been two eight-space racks of questionable quality for US$90 each, two milk crates for added height, a two-tier keyboard stand for US$50 that may or may not hold the weight of the keyboards (the TS-12 is HEAVY!) and may or may not wobble when I play. All this and I still wouldn’t have room for the speakers.
If you want detailed drawings, just see below. And by the way, I’d love to see a picture of your completed furniture, so when you get it just the way you like, snap a picture and send me an e-mail!
Other Studio Furniture
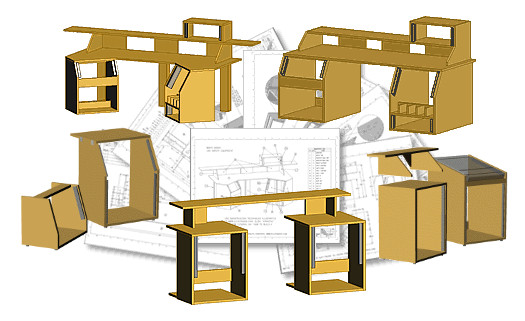
Here’s some of the other furniture that I’ve designed and/or built to give you further ideas. Some of these I have for sale if you’re interested. IMPORTANT: Many of these designs has been updated since the renderings shown.
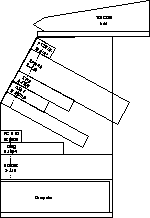
 | Studio Workstation #1 (17 rack units, 38+ CDs, bookshelf). Space for 4 rack units on the left, placed at a comfortable viewing angle, plus a bookshelf below. Space for 6 rack units on the right at an angle, plus space for 38+ CDs and 3 additional rack units (or a CPU) below. Space for two keyboards, studio monitors (speakers), 4 additional rack units above to the right, plus a monitor right at eye level. [more info] |
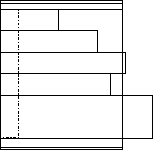
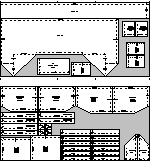 | Cutting diagram for Studio Workstation #1. This piece uses two sheets of wood, and you’ll have some scrap left over for other projects. |
 | Studio Workstation #1 top view showing PC keyboard placement, speakers and lines of sight. Also shows an additional floor unit to the left. |
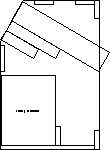
 | Studio Workstation #2, front view (17 rack units, 38+ CDs, bookshelf). Similar to the one above but without the U shape and without room for speakers. |
 | Studio Workstation #2, side view. Also shows placement of PC keyboard. |
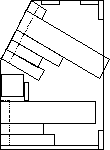
 | Studio Workstation #2, top view. Shows one of the base units turned slightly, plus an additional floor unit off to the right. |
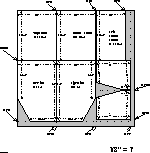
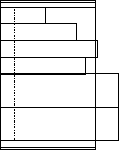
 | Cutting diagram for Studio Workstation #2 Again using two sheets of wood, this piece has much deeper rack cabinets. |
 | Floor Unit #1 (10/12 rack units, mixer, opt. CPU). A floor rack with 6-unit at a very confortable viewing angle, 4 units below, and space for CPU at the bottom. The table top is appropriate for a small mixing console such as the Tascam 644, and is hinged for easy access. |
 | Cutting diagram for floor unit #1 Plywood layout for Floor Unit #1 and Table Unit #1 (see below). |
 | Floor Unit #2 (4 rack units, bookshelf). Meant to support a table top, but can be easily modified to simply stand alone. 4-unit rack at an angle, plus enough space for music books below. |
 | Floor Unit #3 (9 rack units, 38+ CDs). Meant to support a table top, but can be easily modified to simply stand alone. Similar to Floor Unit #2, but with more space for gear. This piece offers 6-units at an angle, plus an additional 4 units below. Also sports a rack for CDs. |
 | Floor Unit #4 (14 rack units, bookshelf). A modification of Floor Unit #2 but with ten additional spaces for rack gear. Includes space for books at the bottom. |
 | Floor Unit #5 (19 rack units, 38+ CDs). A modification of Floor Unit #3 but with ten additional spaces for rack gear. Includes a CD rack. |
 | Floor Unit #6 (36 rack units). A *large* 36-unit rack. Only for the serious studio enthusiast — I never built it. |
 | Floor Unit #7 (12 rack units, rackmount mixer). Built to house a rack-mount mixer and up to 12 units of additional rack gear. |
 | Floor Unit #8 (10 rack units). A simple box for up to ten units. Installing units provides stability. |
 | Table-top Unit #1 (6 rack units). A convenient viewing angle supports six units of space. This design was later modified slightly so the top board acts as a balanced carrying handle. |
 | Table-top Unit #2 (4 rack units or 2 units plus CPU, monitor). Convenient storage for four units of gear, or two units plus a CPU. Designed to support a monitor on top. |
 | Table-top Unit #3 (4 rack units). A basic box for four units of rack gear. |
 | Table-top Unit #4 (6 rack units). A basic box for six units of rack gear. |
 | Table-top Unit #5 (8 rack units). A basic box for eight units of rack gear. |
 | Cutting diagram for tabletop units #1 The half-sheet plywood pattern used to make sets of three Table-top Units #1. |
 | A simple bookshelf designed to fit perfectly between two windows in a corner in my bedroom |
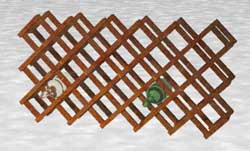 | Just for fun… a stylish wine rack (space for 33 bottles) made entirely out of inexpensive molding. |
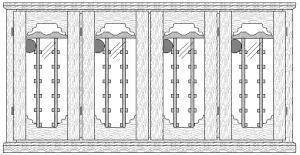 | And a little more complicated fun: A wine cabinet holding 96 bottles of wine. |
[…] theFrankes.com is a good place to kick off – plans for sale […]
In your ipinion what is the best way to make the with of racks? I used to just grab some gear and mount them and mark the other side,cause some gear fits better than others,and I have some old gear with no tolerance for error ,and the new gear has some movement left and right