
We just remodeled our kitchen. A few months ago we had an electrician come out to give us an idea of what it would cost to add in under-cabinet lighting. Five fixtures came in at about $1,800 with a few hundred of that going to a circuit extension. I’m a tinkerer, and that just seemed excessive to me, so I decided to do it myself and saved over 95%.
Now, for about $56 plus time, I have a much better lighting system with three zones of under-cabinet lights, each with its own dimmer, and in-cabinet lighting for some of the deeper cabinets. Here’s how I did it.
The Plan
Here’s the main part of our kitchen. The plan is to add lighting in zones in the following order of priority: 1, 2, 5, 7, 8, 4, 3, 6.
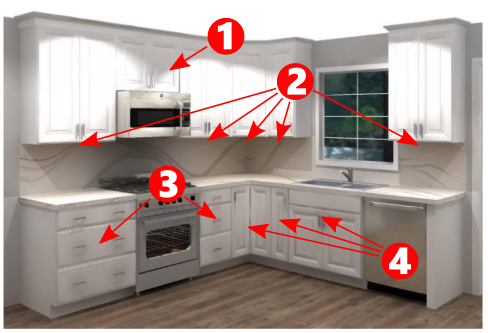
- Zone 1: There’s an outlet for the microwave in here, and I added one for a 12V power supply, which will power all of the kitchen LED lights.
- Zone 2: These five cabinets (in three distinct sections) should get bright white double-row 5730 LEDs, and will all be controlled by a single dimmer knob in the middle section.
- Zone 3: Optionally, the drawers should get single-row 5730 lighting when the deeper drawers are opened.
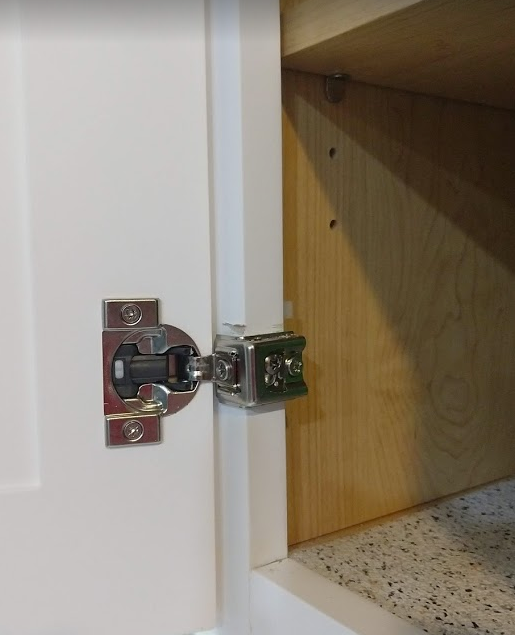
- Zone 4: Also optionally, each deep cabinets should get single-row 5730 LED lighting when the cabinet doors are opened.
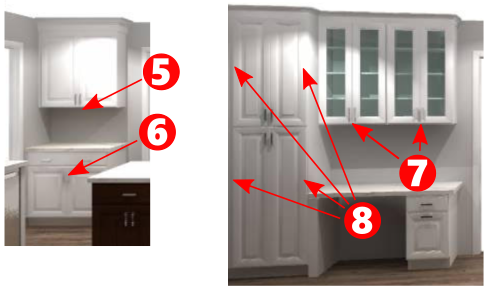
- Zone 5: This is a coffee station, so bright white, double-row 5730 LEDs here, on its own dimmer.
- Zone 6: Optionally, single-row 5730 LEDs to light the lower cabinet — one on each side, that lights when the door is opened.
- Zone 7: This is a desk, and a computer lives here. We’ll install double-row 5730 LEDs for consistency, and keep them on their own dimmer so they’re not too bright for the monitor.
- Zone 7: This is our pantry, so I’ll install single-row 5730 LEDs on each side that light up when that side’s door is opened, plus a main switch that can cut these lights off entirely should either of the door switches fail. The bottom doors definitely need it, but these are optional on the top.
Sourcing the Supplies
I order a lot of tinkering supplies direct from China, and this project is no exception. It can take some time for the supplies to arrive that way, but I’ve never had a problem with the quality. With the exception of the one power supply everything is 12V.
From Amazon.com:
- 200′ reel of 18AWG 2-conductor jacketed wire, $34.75.
- 80 pcs Nylon Cable Clips, $6.99
Home Depot:
- A bag of Grey wire nuts (Idea 71B), $6.27
- A box of 1/2″ pan head wood screws, $4.20
From various AliExpress vendors: (I actually ordered a lot more than I needed for the kitchen here because I’m adding lighting to other areas of the house, too…)
- 15 50cm U-Shaped LED Aluminum Channel, $22.50: This is the channel for the double-row LEDs, with a “milky white” cover and mounting clips.
- 10 50cm U-Shaped LED Aluminum Channel with 6000K single-row 5730 LEDs, $22.54: These are all-in-one LED strips and channels/covers/clips with single-row LEDs (not quite as bright) that are intended for the insides of cabinets.
- 10 50cm V-Shaped LED Aluminum Channel with 6000K single-row 5730 LEDs, $22.00: These are also all-in-one single-row LEDs intended for the insides of cabinets.
- 20 50cm 12V 6000K double-row 5730 LED bar, $19.53: These are bright double-row LED strips for the under-cabinet task lighting.
- 10 70x45x18 White plastic project boxes, $9.75: These boxes will fit inside the 3/4″ recess on the bottom of the cabinets and will house dimmer electronics and wire connectors.
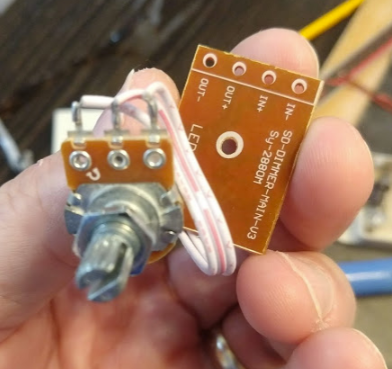
- 3 12V 8A LED PWM Dimmer, $3.96: These are perfectly capable and super inexpensive LED dimmers in big ugly enclosures. I’ll take them apart and install them into the smaller and nicer looking boxes above.
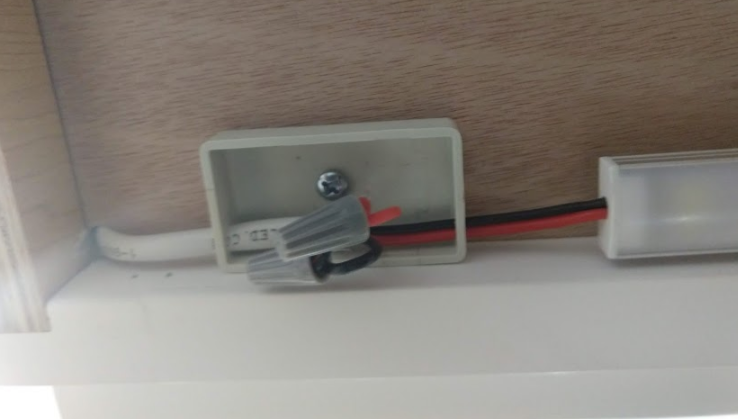
- 10 50x28x15 White plastic project boxes, $4.88: These are tiny project boxes intended to hide the connectors for a single LED strip.
- 10 5A/125V SPDT Hinge Lever Limit Switch, $1.94. These are AC switches, but at 12V I’m not too worried about sparks. They’ll be set up as NC switches so that lights will turn on when doors are opened.
- I’m using a 12V 33A power supply left over from an old 3D printer build. You should be able to get one for $20 or so. You can get a smaller power supply if you don’t need as many LEDs. (More on this later, too.)
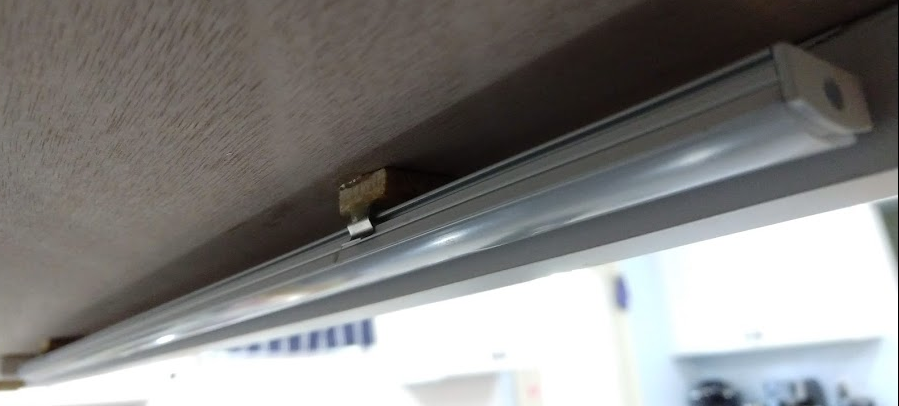
Mounting the LEDs
I cut tiny squares of 1/4″ plywood and screwed the LED channel mounting brackets to them, and then I hot gorilla glued those plywood spacers at the front of the cabinet, directly behind the face frame. This extends them just enough so that the shadow of the face frame falls just outside of the countertop itself and provides a little more opportunity for air cooling. (You can’t just hot glue the LED sticks to the cabinet because the LEDs will just melt the glue. Even with the wood to insulate it, hot glue fixing the bracket to the cabinet failed occasionally.)
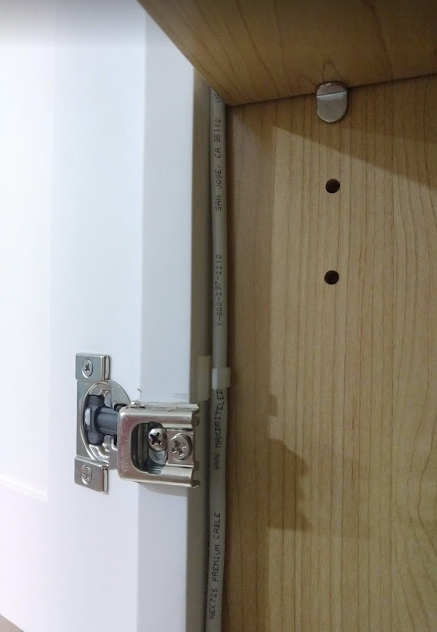
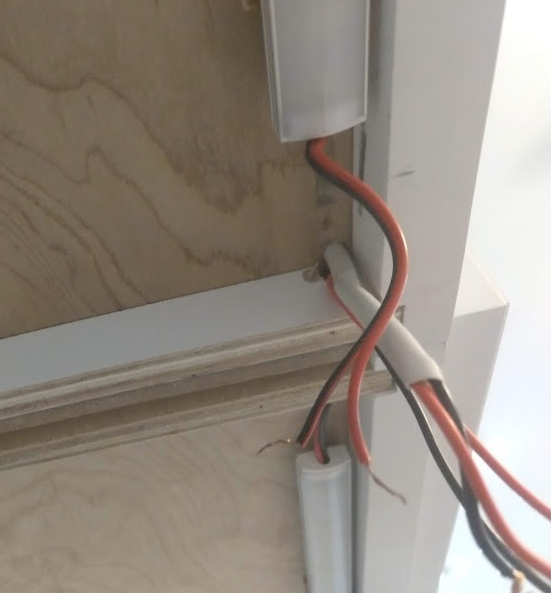
Hiding the Wires
The wires are pretty well hidden and they look tidy. For the upper cabinets, the wires usually enter the top cabinet right behind the face frame at one side, travel all the way down through the cabinet fastened to the back of the face frame, and exit at the bottom. There, they enter either one of the 70x45x18 boxes if the zone needs a dimmer, or one of the 50x28x15 boxes if I’m just hiding the connectors.
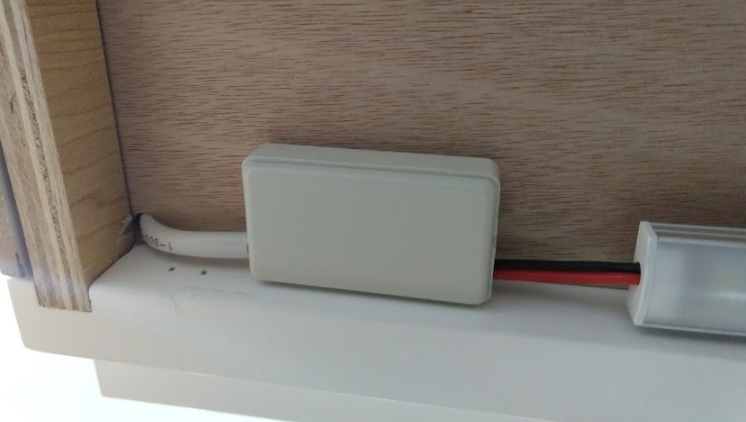
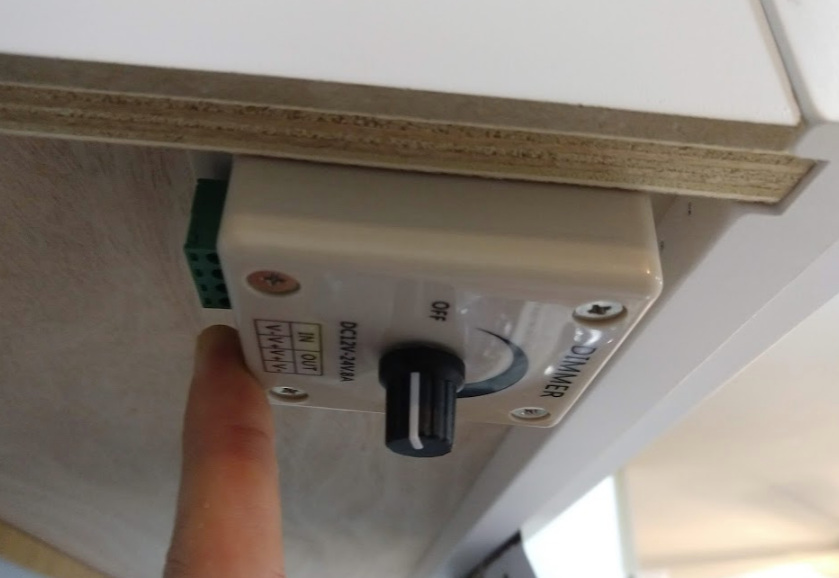
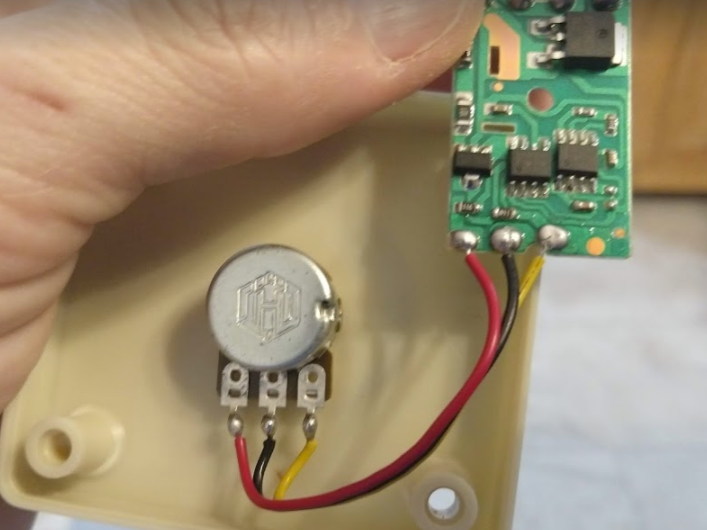
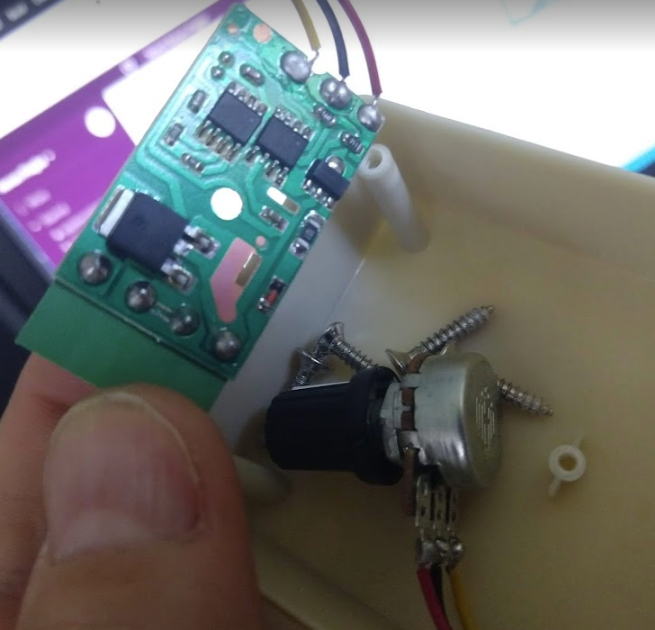
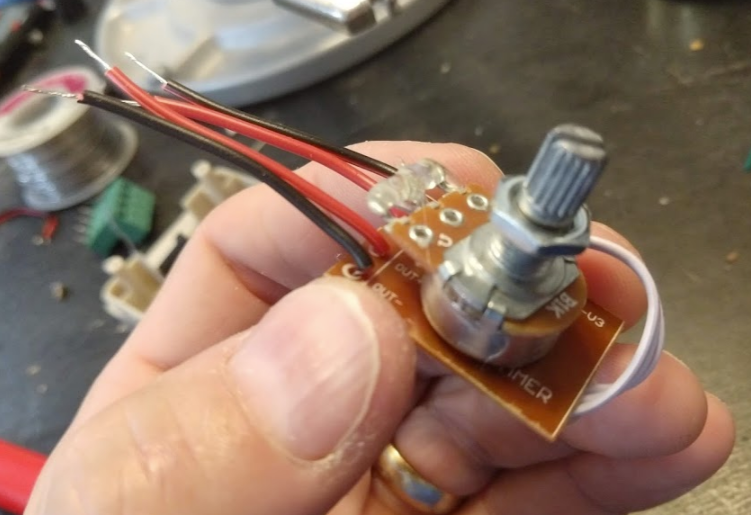
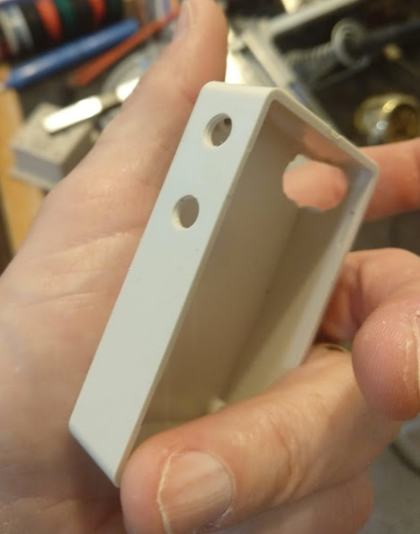
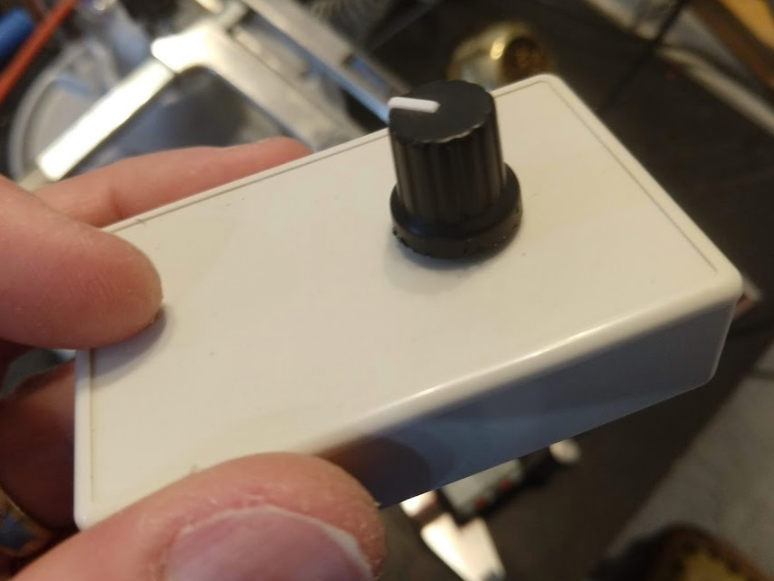
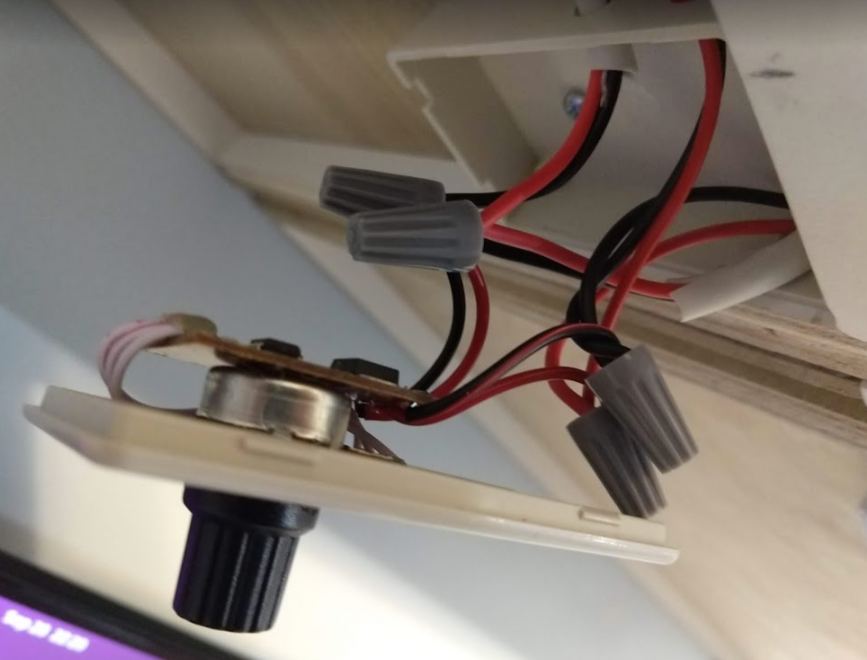
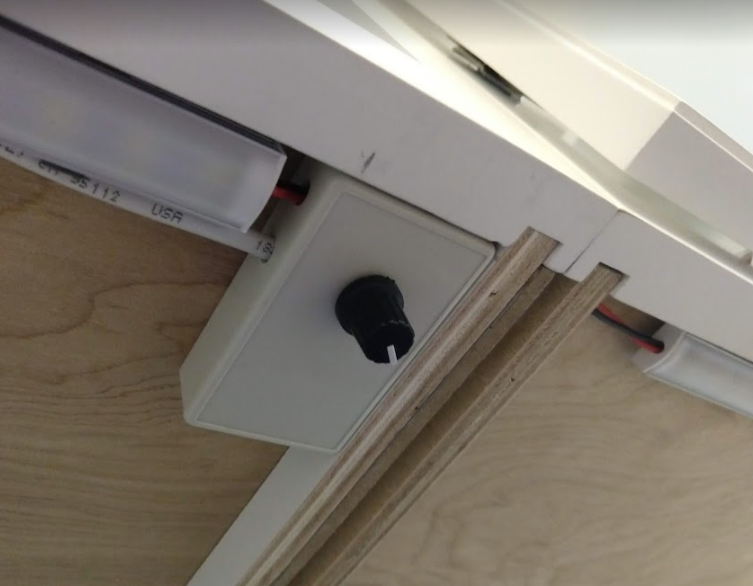
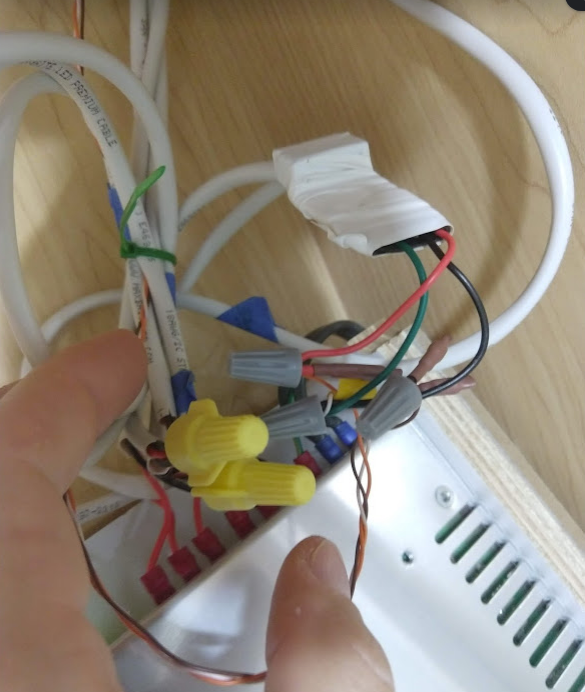
Reworking the Dimmers
I used the 70x45x18 project boxes when I needed to include any of the dimmer electronics, and basically drilled holes where I needed them based on what wires were present and where they needed to enter for each specific location. The original boxes were pretty big and ugly, and the result is much cleaner.
These photos are for the desk lighting (Zone 7). You should probably be comfortable with a soldering iron before you try this modification, that that’s really easy to do.

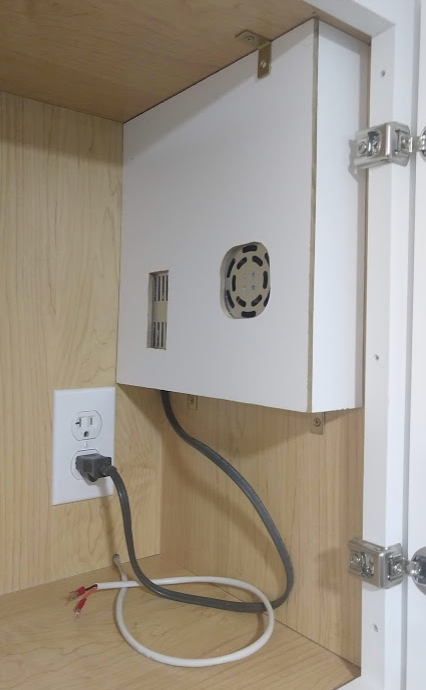
Zone 1 – Power Supply Cabinet
This cabinet contains the 12V, 33A power supply, which will be the sole power source for all the LEDs in the kitchen. (The currently installed lighting draws 11.73A with everything on.) This cabinet also contains most of the the dimmer electronics for Zone 2, but not the dimmer knob.
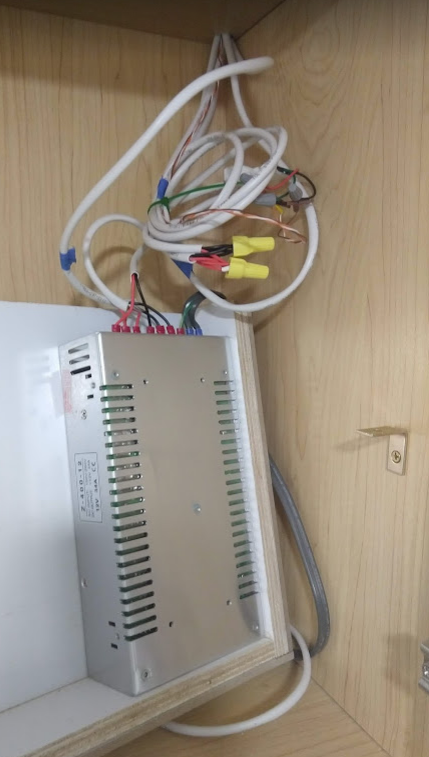
Exiting this cabinet are:
- three dimmer-controlled 12V wires for each of the three sections of Zone 2
- one 12V wire leaves goes through the wall and into the lower cabinets in order to power Zones 3 & 4
- three strands of a Cat5 network wire so the dimmer knob can be positioned on the bottom of the corner cabinet. These are very low current wires, and the length does not affect the dimmer functionality.
- two additional 12V wires go to the different areas of the kitchen defined below (Zones 5 & 6, and 7 & 8).
Zone 2 – Main Kitchen Under-Cabinets
The three network wire strands and the dimmer-controlled 12V wire enter the top of the corner cabinet at the left and exit at the bottom front left. There, they enter one of the 70x45x18 boxes, where the dimmer knob is mounted and the wires are connected. Remember that the dimmer electronics are actually in the power supply cabinet (Zone 1), because this cabinet is the most convenient location to serve the three distinct areas of the zone (left of the microwave, the corner, and right of the sink).
In the box, the 12V line is split to power the 12 segments under Cabinet 2 (on the left), and the 12 total segments for Cabinets 3 & 4 on the right. (When possible feed the power into the middle of a run like this or else you might start to notice that the LEDs at the end of a run are not quite as bright as the others.)
This zone uses a total of 48 segments (four 50cm LED sticks, with one cut into two parts), and draws 5.23A (62.8 watts) when fully on. This is 0.11A/segment.
- Cabinet 1 (left of microwave): One 12-segment (50cm) U-shaped LED bar with double-row 5730 LEDs
- Cabinets 2, 3, & 4 (in the corner): One 12-segment bar of the same for Cabinet 2, and then another cut into one 7-segment bar for the corner, and one 5-segment bar on the right
- Cabinet 5 (right of the sink): Another single 12-segment (50cm) U-shaped LED bar with double-row 5730 LEDs
Zones 3 & 4 – Main Kitchen Base Cabinets
I haven’t installed these yet, apart from running a single 12V wire from the power supply cabinet through the wall, and then entering the back of the drawer cabinet to the right of the oven. It’s capped off there for later use.
Zones 5 & 6: Coffee Station
The un-dimmed 12V wire from the Power Supply Cabinet is split above the cabinet, with one branch enters the cabinet at the top left and going through to the bottom left, and another branch going through the wall to the back of the lower cabinet (where it’s capped off for later installation). The wire for the under cabinet LEDs enters a 70x45x18 box containing a dimmer (both the electronics and the knob), and the dimmer-controlled output that that feeds the LEDs.
Zone 5 uses a total of 21 segments (1.75 50cm LED sticks), and draws 2.36A (28.3 watts) when fully on. This is 0.11A/segment.
- One 21-segment U-shaped LED bar with double-row 5730 LEDs, made by joining a 12-segment (50cm) bar with three segments cut from another bar.
Zone 7: Desk
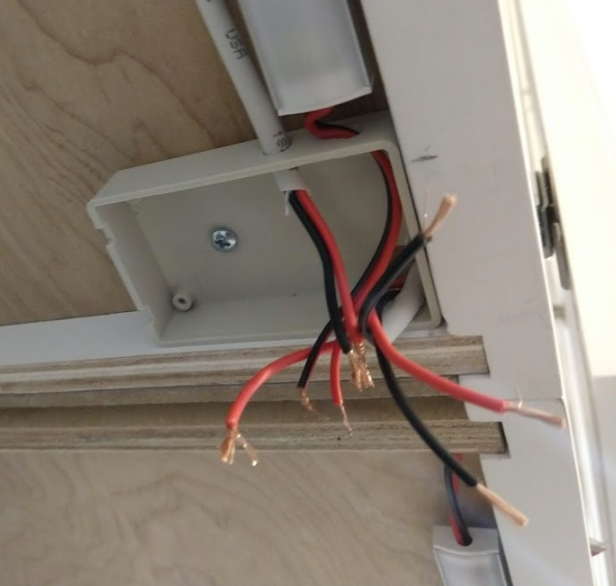
An undimmed 12V wire from the Power Supply Cabinet enters the left glass cabinet at the top left and goes through to the bottom left, where it enters a 70x45x18 box. The box splits the undimmed 12V into two branches: One goes behind the LED strips to the left and into the pantry (described in the next section), and the other goes into the dimmer housed in the same box.
The dimmer has two outputs: One serves a 6-segment bar on the left, and the other serves a 15-segment bar on the right–both made from original 50cm stock. (Note that our kitchen actually ended up with three glass doors instead of four, which is why the cabinet on the left is smaller than the one on the right.)
This zone uses a total of 21 segments (1.75 50cm LED sticks), and draws 1.74A (20.9 watts) when fully on. This is 0.08A/segment. This seems a little lower than it should be, so I still need to debug that. Like before, I try to run the power to the middle of the zone.
- One 6-segment U-shaped LED bar with double-row 5730 LEDs, made by cutting a 12-segment (50cm) bar in half.
- One 21-segment U-shaped LED bar with double-row 5730 LEDs, made by joining a 12-segment (50cm) bar with three segments cut from another bar.
Zone 8: Pantry
The pantry wire enters straight into the lower part of the pantry from the junction box in the middle of Zone 7. The wire first goes through a switch that can be used to cut the power to the whole pantry in case any of the limit switches fail closed (on). Then it splits into two: one wire for the bottom left of the pantry, and one for the bottom right. (The upper pantry doors get more natural light than the lower ones, so we didn’t wire those up.)
The wire for each side of the lower pantry first goes through a limit switch wired up as normally closed (NC). This means that when the switch is pressed when the door is closed, the circuit will open and cut the power, and when the door is open, the circuit will close and the lights will turn on.
The in-cabinet lighting doesn’t need to be as bright, so it’s just used single-row 5730 LED bars for these, but two on each side, and again with power going to each set instead of stringing them together. I used V-shaped channels, too, mounted vertically along the inside of the face frame so that the light is projected into the middle of the cabinet instead of toward the back.
This zone uses a total of 48 segments (1.75 50cm LED sticks), and draws 2.4A (28.8 watts) when everything is on. This is 0.05A/segment.
- Four 12-segment V-shaped LED bar with single-row 5730 LEDs, two for each side.
Conclusion
Not all zones are complete, and I’m not even convinced that we need more lighting at this point. I think I will try to add some of the lower cabinet lighting, though, just for kicks.
Although I spent a more in total on supplies (because I ordered more than I needed for just the kitchen, and there’s still more to install), the total cost of the supplies I’ve actually used in this project is about $56 — just over 3% of the original $1,800 quote. It’s a lot more functional that what was originally quoted, has more fixtures, and probably looks a lot more custom… and I had a lot of fun doing it.