
Backstory: We took down a red oak a couple years ago (Part 1 and Part 2) and I got it milled up for projects. Wifey wants a desk but the grain is a little tricky and my thickness planer just isn’t going to cut it very well (pun totally intended). I don’t really have the room for another big tool, so I thought I’d just try to make one. Lately I’ve been using Onshape and JLC3DP (from JLCPCB) to design and print the parts — highly recommended — lmk if you want files or further details.
- Watch the 3D Printed Pulley Reel: https://youtube.com/shorts/hPq0o2DhSTM
- And the dust attachment Short: https://www.youtube.com/shorts/NUxoP5SqJ34
Like/subscribe/share if you want — apparently that’s good for the algorithm. Here’s the build:
Here are the found and purchased parts:
- An old pressboard shelf from my college days (for the drum)
- Some 9″ wide hardwood for the sides (plenty of oak on hand now haha)
- Various pieces of plywood and hardwood
- A rod from a replaced bathroom towel rack — it’s 5/8″ diameter
- 2 pcs 5/8″ roller bearings ($5 on Amazon)
- Vevor 1.5HP 56C Single Phase 1750RPM motor with 5/8 keyed shaft (about $150 from ebay)
- A random 14AWG appliance cord
- 5′ of Type A V-Belt ($27 on Amazon)
- A KCD4-201 20A rocker switch (five for $4 on Amazon)
- Biscuits and 3.5″ screws
- Old cabinet and door hinges
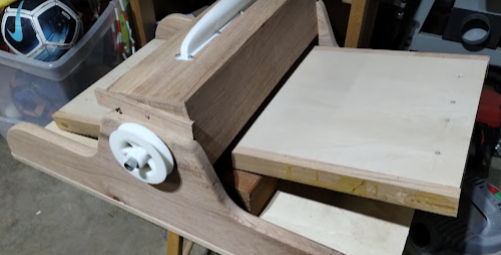
The base is plywood. I clamp it down to a table that I mount on sawhorses. The table has the motor attached to the bottom using old door hinges, so it can swing down and provide belt tension. The sides were jointed and shaped to remove some bulk.
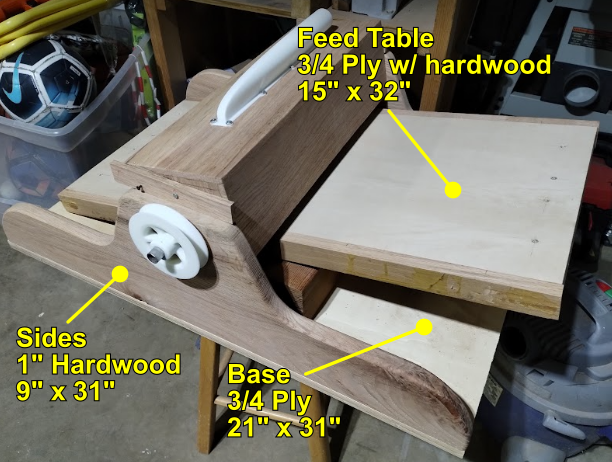
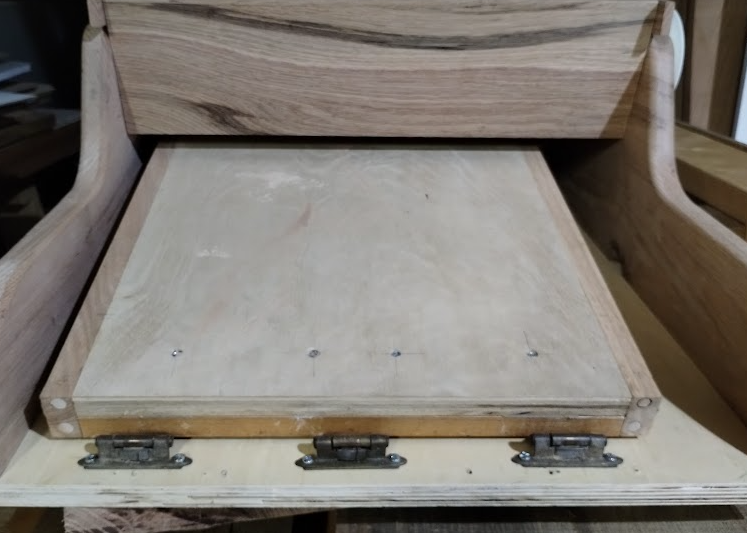
The feed table is also plywood with some hardwoods to give it structure and ensure it’s flat — oak on the outsides with biscuits and glue, and some hard maple on the inside (because that’s what I had on hand). You can see where I shimmed the slats a little bit to pull the plywood perfectly straight. Right now I have a block of wood as the height adjuster, but I’m going to change this to something a little more accurate later.
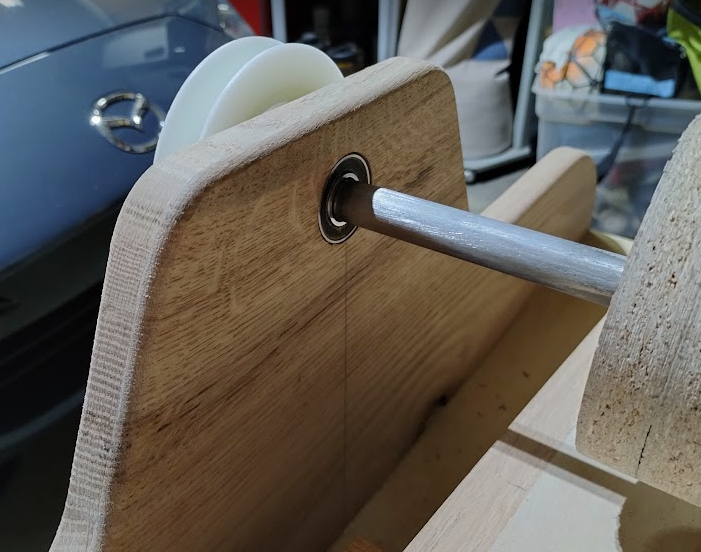
I attached the sides to be base using five long wood screws on each side, carefully keeping it square. I drilled 1-3/8″ for the bearings using a Forstner bit, and then the 5/8″ for the shaft (which is an old bathroom towel rod). These are currently just press fit, and the drum guard holds them in place. The Mazda is super fun to drive — you should totally buy one.
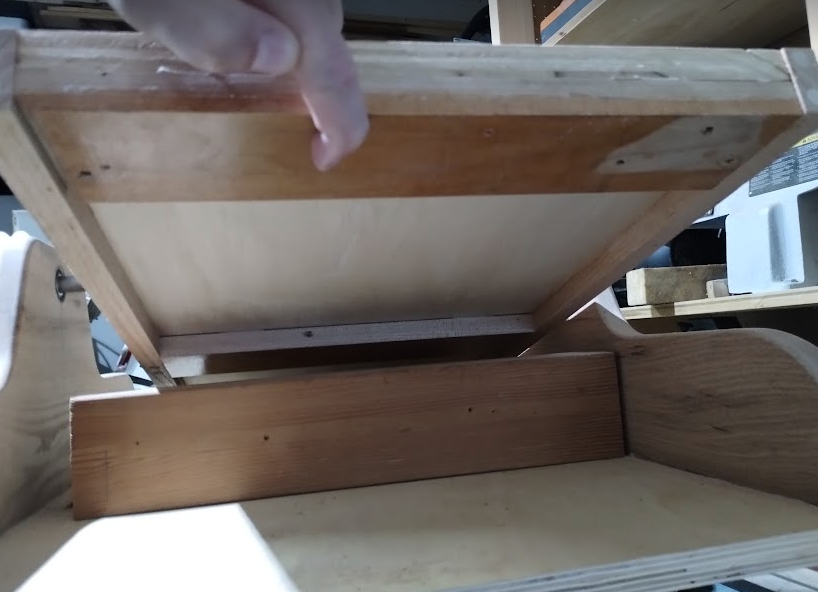
The other end of the feed table is attached with some old cabinet hardware from a kitchen remodel. Be careful not to box yourself into a corner with the hinges you use because if they fasten from the inside, you won’t have access to them once you attach the drum. Later, I plan to attach these to a hardwood extender instead of to the plywood directly, but this works for now. You can see that I used parts of the actual cabinetry to reinforce the feed table.
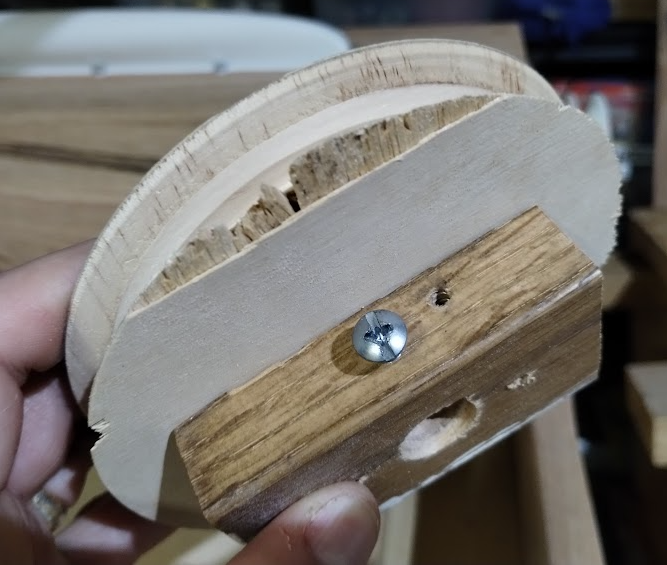
For the pulleys are about 4″ diameter. I roughed out the shape, mounted them to the motor and turned them there using dimensions I found online. This one is kind of beat up, so it’s the first one I replaced with a 3D printed part. I used more oak as a hub, screwed directly to the pulled, and used a wood screw (with the end cut off) as a set screw.
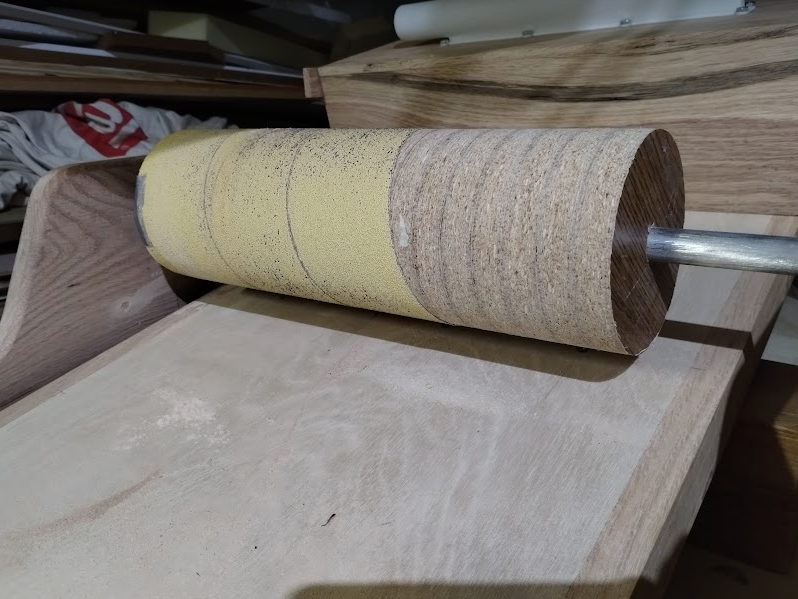
For the drum, I started with an old pressboard shelf from my college days, cut out a bunch of 4.25″ squares and roughly rounded them on the band saw. Then I drilled the 5/8″ hole for the shaft and stacked them on. They’re just press fit into place. The drum is 13″ wide at the moment, but I have space to grow it if necessary. I rounded it by gluing some sandpaper to a flat board and letting the drum spin against it. (Yes, the drum is only partially covered here.)
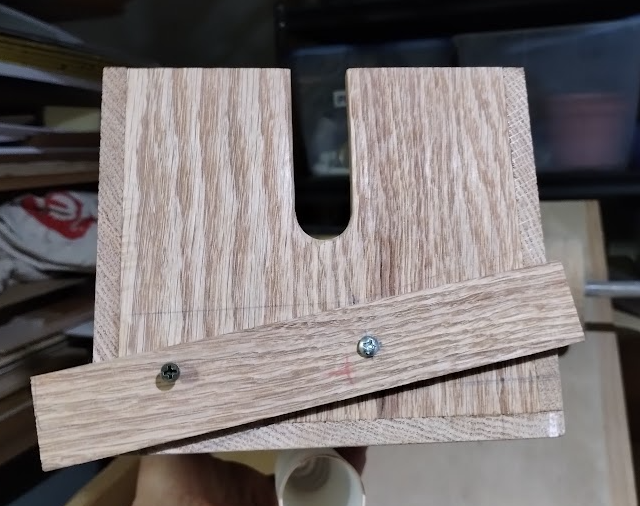
For the drum guard, I resawed some more oak and basically formed a box around the drum with about 1/2″ of play on all sides. The groove is a bit wider than 5/8″ so it doesn’t have to ride directly on the shaft. The position of the drum guard is held in place by a slat on either side. There’s a pivot point (the silver-colored screw) attached with a nylon lock nut, and a set screw to hold it in place. I’m not entirely happy with this and will probably end up changing it so that the guard can be fastened directly to the sides and positioned there.
Here’s the ham and cheese sandwich I made for lunch. It was awesome.
Other than what I mentioned above, I still want to build a belt and pully guard, and cover the ends of the axle.