How to Make Laser-cut Loaves and Fishes for Godly Play
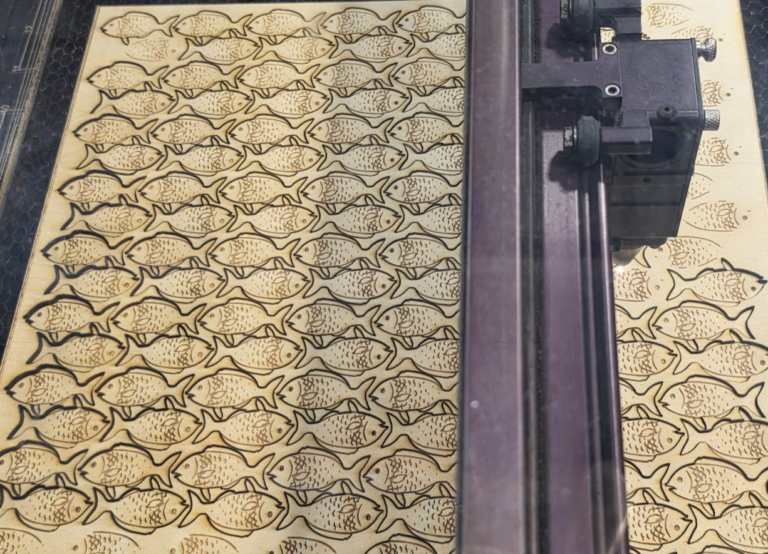

About a year ago I make a bunch of loaves and fishes for a Godly Play story at the church. I made them out of 3mm door hanger plywood that I picked up at the local craft store using a…
About a year ago I make a bunch of loaves and fishes for a Godly Play story at the church. I made them out of 3mm door hanger plywood that I picked up at the local craft store using a…
Use code “MAY20SALE” to get 20% off rack plans in May. This code can only be used a limited number of times, so don’t delay! Go to the purchase page here and enter the code at checkout! Consider this…
Backstory: We took down a red oak a couple years ago (Part 1 and Part 2) and I got it milled up for projects. Wifey wants a desk but the grain is a little tricky and my thickness planer just…

Here’s how I start with a screenshot (bitmap) of a vector image and prepare it for laser cutting. Usually for cutting I need one path around the outside of the image (for the cut path), and then other paths that…
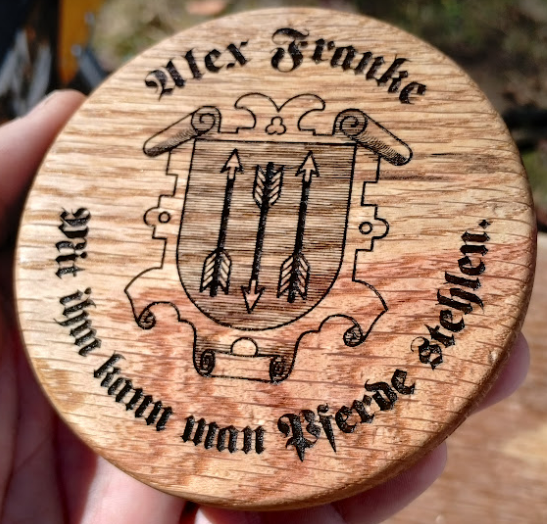
What’s a Deckel? A Deckel is a lid for a drink. It fits over a glass (like one of those large German Maas mugs or a red solo cup) to identify it as your own and to keep the flies…
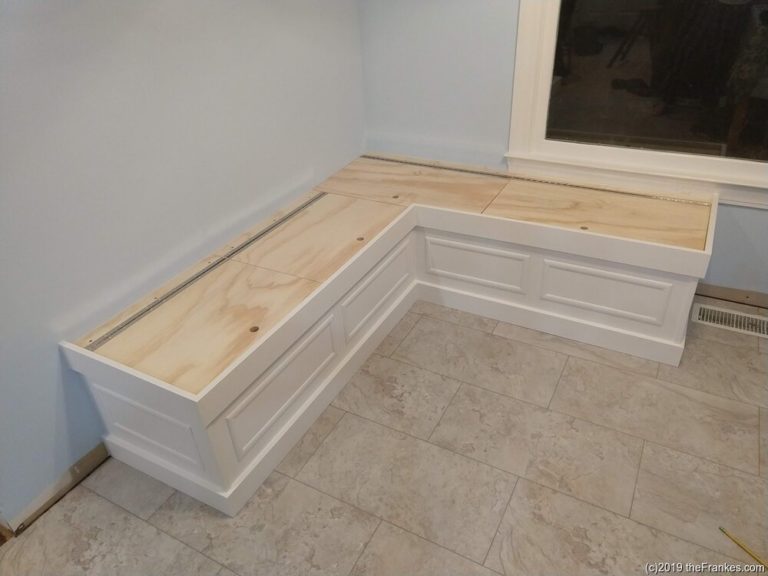
I built this banquette over the weekend, posted it on Facebook, and now I have a few people asking for plans. While I don’t have any plans specifically, I did take a lot of pictures along the way to show…
We got a Mazda CX-5 and so far we’re pretty happy with it. We wanted an organizer in the back, though, to help prevent things from falling over and rolling around, and we wanted it to be easy to collapse…
Here’s a great, free, and easy to use online cutting list optimizer and generator for panels or boards. Input cut setting like kerf and trim sizes, the sizes of the stock panels, and the parts you need, and it’ll generate…
At our last 3D Printer Club meeting, the kids on the team started cutting threaded rods. We were clamping the rods to a table with a standard bar clamp to keep them in place. The problem was that they were…
It’s not easy to find metric drill bits in the United States. For a lot of applications, letter, fractional, or wire gauge drill bits are accurate enough, are more commonly available, and are much more reasonably priced. This tables shows…